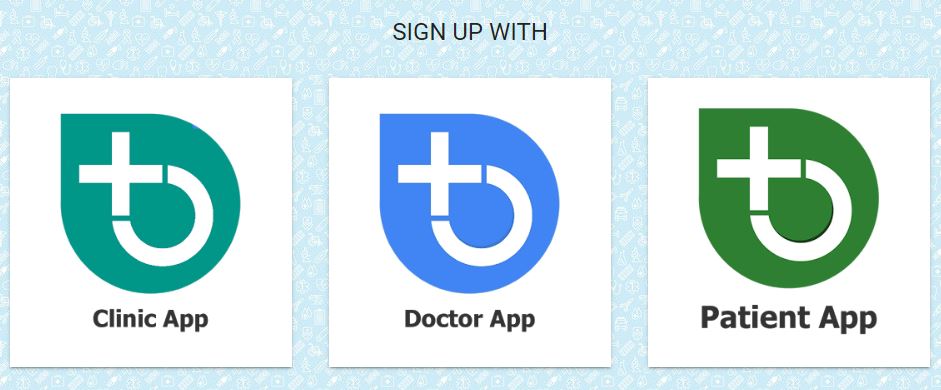
গুগল ক্রোম ব্রাউজার ব্যবহার করে bdemr.com খুলুন। "SIGNUP" এ ক্লিক করুন
এই পেইজ টি খুলবে
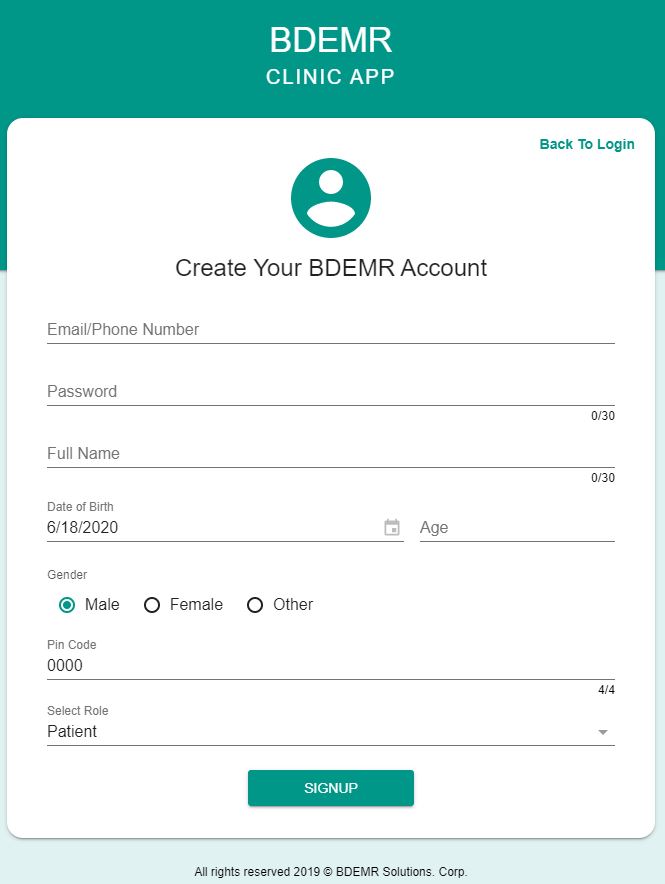
তথ্য পূরণ করুন


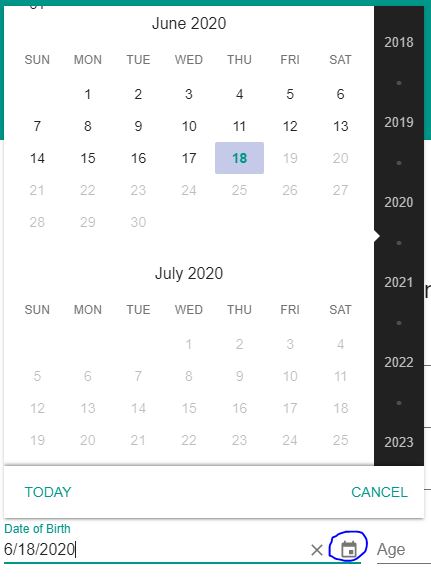
এখানে ক্লিক করলে যে ক্যালেন্ডার আসবে সেখানে সন, মাস ও তারিখ দিন ।


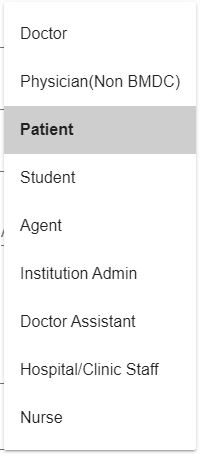

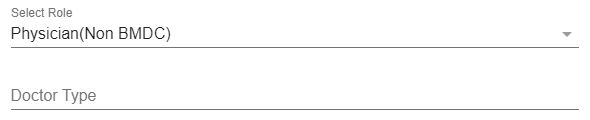
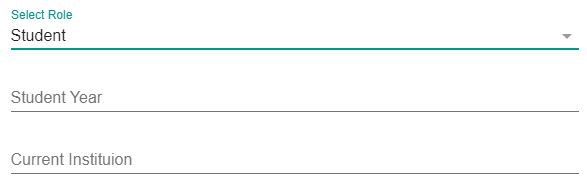
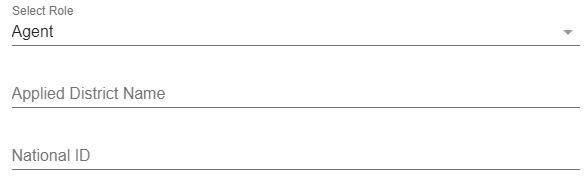
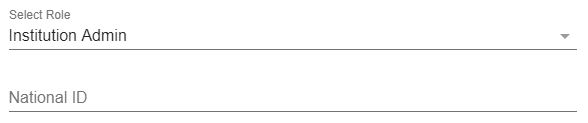
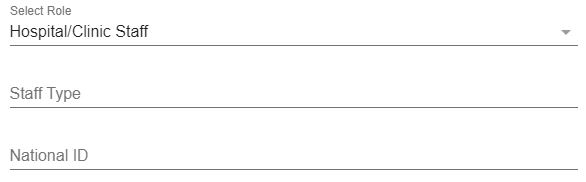
ভিন্ন রোলে একাউন্ট তৈরির ক্ষেত্রে বিভিন্ন তথ্য পুরন করতে হবে। আমাদের সফটওয়্যারে ডাক্তার/ ফিজিশিয়ান (Non BMDC)/ রোগী/ ছাত্র/ এজেন্ট/ প্রতিষ্ঠানের প্রশাসক/ ডাক্তারের সহায়ক/ হাসপাতাল অথবা ক্লিনিকের কর্মচারী/ সেবিকা (নার্স) হিসেব একাউন্ট খোলা যাবে।


নার্স এবং রোগী হিসেবে একাউন্ট খোলার জন্য ভিন্ন কোন তথ্যের প্রয়োজন নেই।
PIN অর্থ Personal Identification Number. যে কোন ৪ টি সংখ্যা দিয়ে আপনি আপনার PIN গঠন করবেন। একজন রোগীর ফাইল খুলতে গেলে একজন চিকিৎসককে এই PIN দিতে হবে। এই PIN আপনার একাউন্ট ছাড়া আর কোথাও সঞ্চিত থাকে না। খানিকটা আপনার ক্রেডিট কার্ডের PIN এর মত। আপনার ছাড়া আর কারও এই PIN জানার প্রয়োজন নেই। চিকিৎসক কিম্বা চিকিৎসকের সহকারীর সামনে আপনি এই PIN ব্যবহার করবেন।
লগিন করার পরে আপনি আমাদের এ্যাপটি ব্যবহার করতে সক্ষম হবেন। আপনি যে রোল অনুযায়ী একাউন্টটি তৈরি করেছেন আপনি আমাদের বিভিন্ন এ্যাপের মাধ্যমে সেই রোল অনুযায়ী সেবা গ্রহণ অথবা সেবাদান করতে পারবেন। এছাড়াও আপনার একাউন্টের যেকোন তথ্য খুব সহজেই এডিট করতে পারবেন এবং পেশেন্ট এ্যাপের মাধ্যমে খুব সহজেই ডাক্তারের বুকিং থেকে শুরু করে প্রেসক্রিপশন/ টেস্ট রিপোর্ট/ ডাক্তারের সাথে কথা বলা সহ সকল কাজ সম্পন্ন করতে পারবেন।
BDEMR এ যিনি বা যারা সাইন আপ করবেন তারা বিভিন্ন ভাবে এটা ব্যবহার করতে পারেন। বর্তমানে যে সমস্ত ভূমিকা নির্দিষ্ট করা আছে তা হচ্ছে চিকিৎসক (Doctor), রোগী (Patient), মেডিকেল ছাত্র (student), প্রতিনিধি (Agent), চিকিৎসক সহকারী (Doctor’s Assistant) , হাসপাতাল বা ক্লিনিকের ব্যবস্থাপক (Hospital/Clinic admin), হাসপাতাল বা ক্লিনিকের কর্মকর্তা/কর্মচারী (Hospital/Clinic Staff)। সব ভূমিকার জন্যই প্রথম সাইন আপ যথেষ্ট। তবে প্রত্যেক ভূমিকার জন্য আলাদা করে প্রয়োজনীয় তথ্য দিতে হবে।
প্রত্যেক ভূমিকার ব্যবহার ও দায়িত্ব ভিন্ন। রোগীর ব্যবহার করা যে কোন তথ্য অতি সংবেদনশীল এবং গোপনীয়। তাই রোগীর তথ্যের সংস্পর্শে আসেন এমন সবাই কে তার সম্পূর্ণ তথ্য পূরণ করতে হবে।
রোগীর ব্যবহার করা যে কোন তথ্য অতি সংবেদনশীল এবং গোপনীয়।তবে এটি একান্তই রোগীর দায়িত্ব যে তথ্য পূরণে তিনি কারও সাহায্য নেবেন কিনা। নিজে অপারগ হলে রোগী নিজের প্রয়োজনে ও তাঁর সম্মতিতে অন্য কাউকে দিয়ে তথ্য পূরণ করতে পারেন। এই জন্য BDEMR দায়ী নয়।
আপনি যদি patient হিসেবে একাউন্ট খুলে থাকেন সেক্ষেত্রে পরিবারের সবার জন্য নির্দিষ্ট একাউন্ট করতে হবে, কারন প্রতিটা রোগীর নির্দিষ্ট তথ্য ভিন্ন হয়ে থাকে। এবং প্রতিটা রেকর্ডই মূল্যবান। তাই যার যার নির্দিষ্ট একাউন্ট খুলতে হবে। তবে কারো যদি ফোন নাম্বার না থেকে থাকে সেক্ষেত্রে আপনার ফোন নাম্বারের শেষে -১ বা এরকম নাম্বার যুক্ত করে একই নাম্বার দিয়ে পরিবারের বিভিন্ন ব্যক্তির একাউন্ট খুলতে পারেবন। তবে অবশ্যই যার একাউন্ট খুলছেন তার তথ্যগুলো সঠিকভাবে দিতে হবে।
patient.bdemr.com এ প্রবেশ করার সাথে সাথে দুটি অপশন দেখতে পারবেন,
পেশেন্ট এ্যাপে লগইন করুন এবং এপয়েন্টমেন্ট বুকিং দিন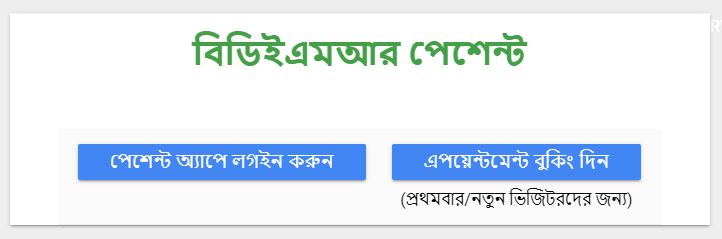
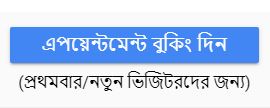
এপয়েন্টমেন্ট বুকিং দিন (প্রথমবার/ নতুন ভিজিটরদের জন্য)এখান থেকে আপনি প্রথমবারের মতন এপয়েন্টমেন্ট বুকিং দিতে পারবেন এবং একাউন্ট তৈরি করতে পারবেন।


অনুসন্ধানে ক্লিক করুন
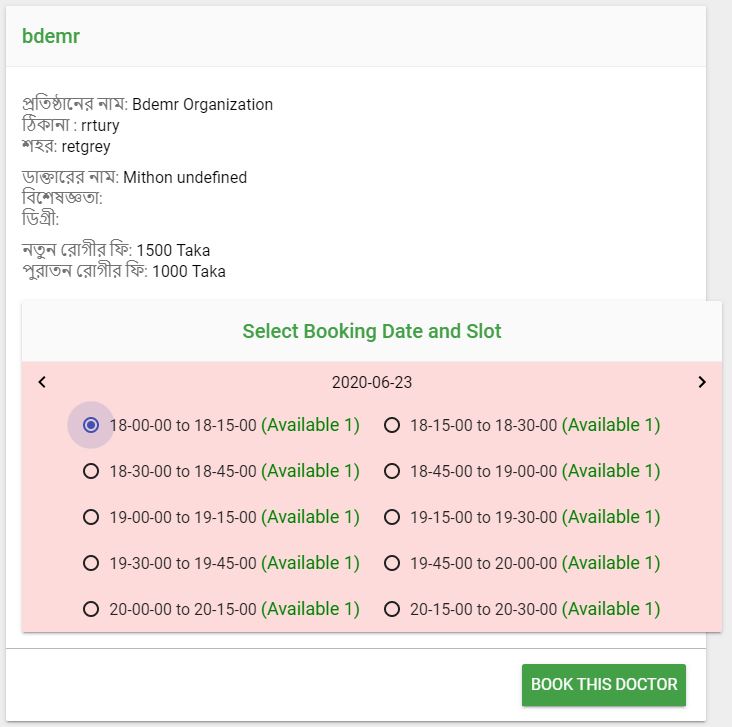
ডাক্তারের চেম্বার নীচে দেখা যাবে, নির্দিষ্ট সময় নির্বাচন করুন এবং Book this Doctor বাটনটিতে ক্লিক করুন।
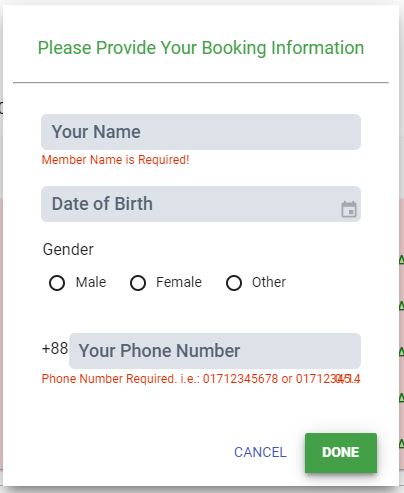
Done বাটনটিতে ক্লিক করলেই আপনার আইডি তৈরি হয়ে যাবে এবং একই সাথে আপনার বুকিং নিশ্চিত হয়ে যাবে
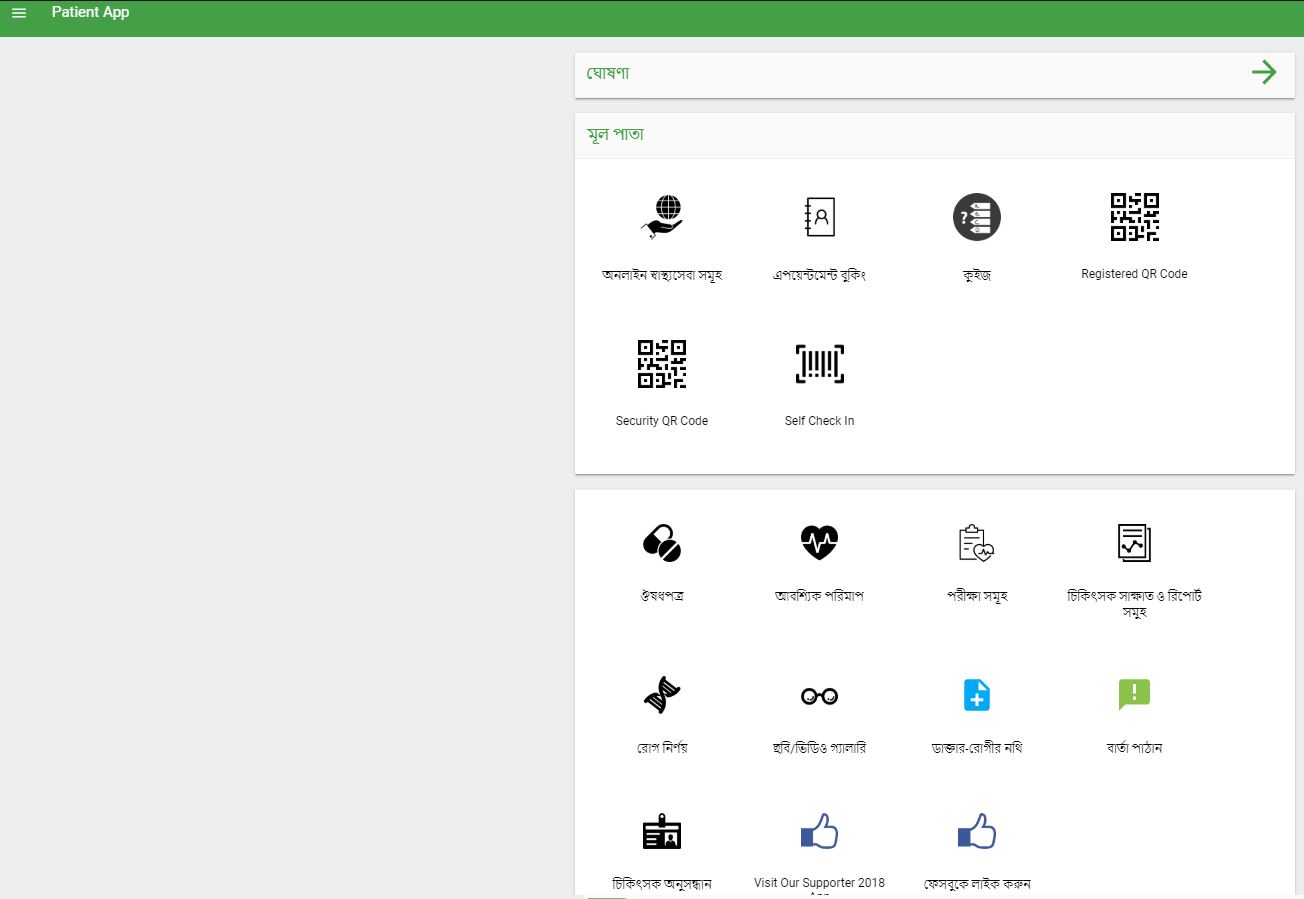
পেশেন্ট এ্যাপে লগিন করুন
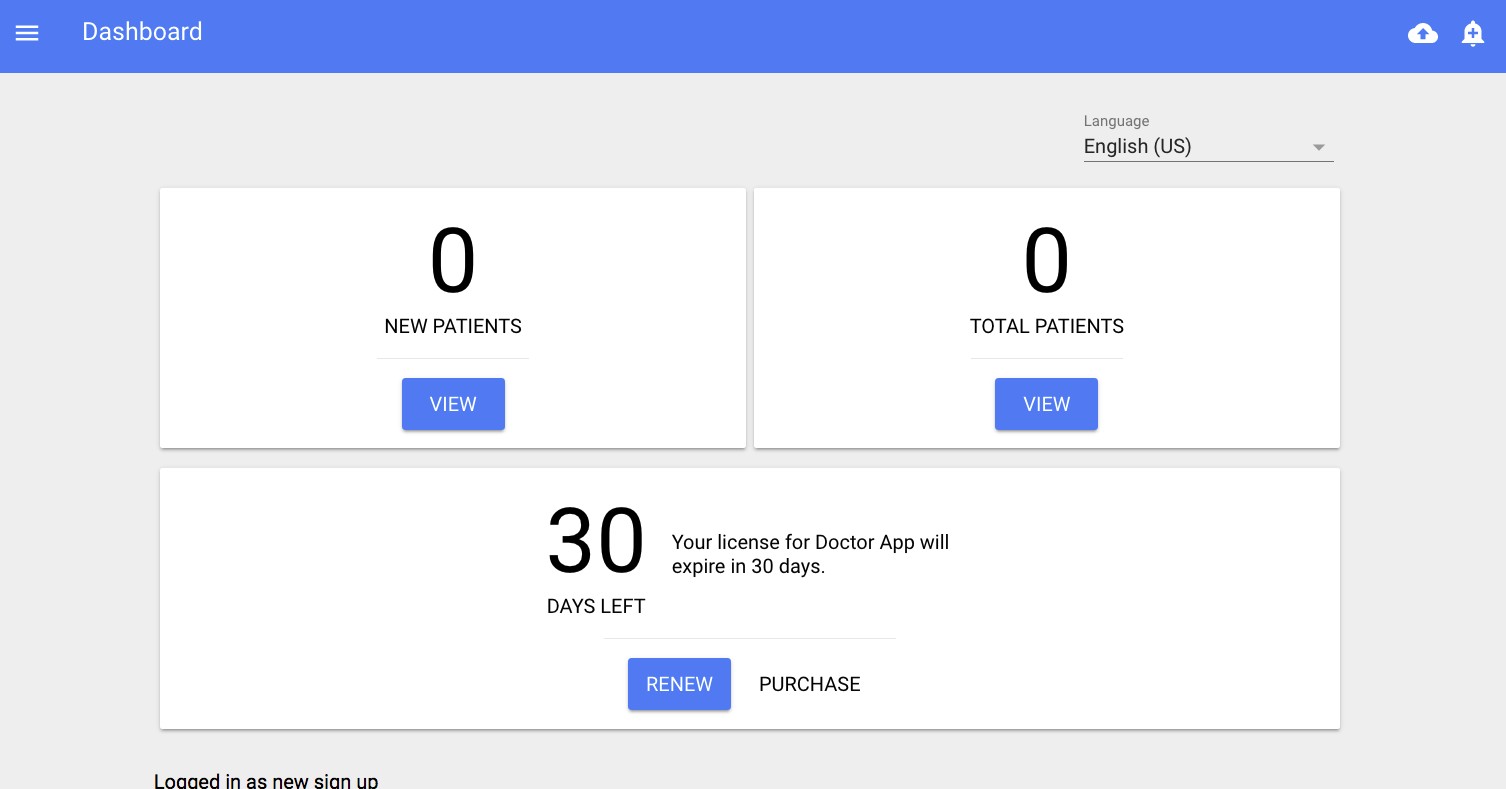
লগ ইন এর পরে ড্যাশবোর্ড দেখুন।
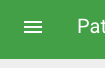
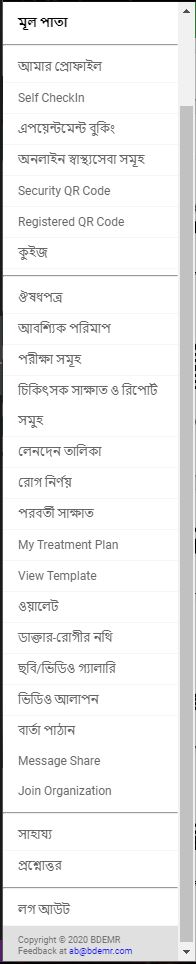
একেবারে বাম দিকে "হ্যামবার্গার সাইন" ( ৩ টা দাগ একসাথে ) Hamburger Sign (Row of 3 lines) ☰ এটাতে ক্লিক করলে বাঁ দিকের ন্যাভিগেশন ট্যাব দেখা যায়।
এখানে ক্লিক করলে বাম দিকের প্যানেল দেখা যায়
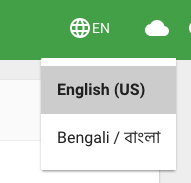
Languageঃ এখানে ক্লিক করে সম্পুর্ন এ্যাপের ভাষা পরিবর্তন করে বাংলা অথবা ইংরেজী করে নিতে পারবেন।
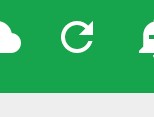
ক্লাউড বা মেঘের চিহ্নঃ এটা ক্লিক করলে সমস্ত তথ্য সার্ভারের সাথে হাল নাগাদ হয়। প্রত্যেকবার অ্যাপ টি খোলার পরে যদি হাল নাগাদ তথ্য দেখতে চান তাহলে এখানে ক্লিক করুন। এছাড়া আপনি পুরনো তথ্য দেখতে থাকবেন। তবে প্রয়োজনের অধিক এখানে ক্লিক না করা উচিৎ। ফ্রি হিসেবে দেওয়া নির্দিষ্ট সংখ্যক বার দেখার পরে , বাড়তি সংখ্যক হালনাগাদের জন্য সামান্য ফি দিতে হতে পারে।

গোল তীর চিহ্নঃ এটা ক্লিক করলে এই পাতাটি রিফ্রেশ হয়।


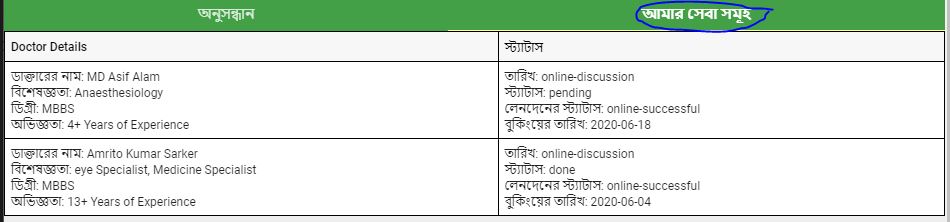
একদম উপরে লেখাঅনুসন্ধান (search)ওআমার সেবা সমূহ (My Services)
অনুসন্ধানএখান থেকে আপনি প্রতিষ্ঠান, ডাক্তারের নাম, অভিজ্ঞতা, ডিগ্রী, বিশেষজ্ঞতা অথবা সব কিছু লিখে ডাক্তারের অনুসন্ধান করতে পারবেন।

নির্দিষ্ট ডাক্তারকে নির্বাচন করে Book and pay (from wallet) তে ক্লিক করে আপনার অনলাইন সেবা নিশ্চিত করুন

আমার সেবা সমূহএখানে অনলাইনের নেয়া আপনার সকল সেবাগুলো দেখতে পারবেন
প্রতিষ্ঠানের নাম দিয়ে অনুসন্ধান করুন (Search by Organization)এখানে প্রতিষ্ঠানের নাম লিখতে হবে।

বিশেষজ্ঞ বিষয় নির্বাচন করুন (select specialization)এখানে ডাক্তারের বিশেষজ্ঞতা লিখতে হবে (যদি জানা থাকে, বাধ্যতমূলক নয়)

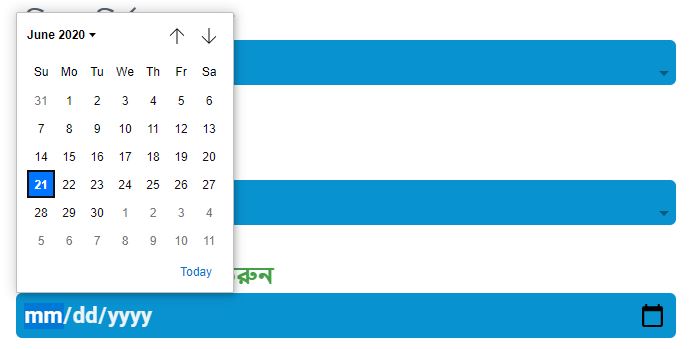
বুকিং তারিখ প্রদান করুন (Select a booking date)এখান থেকে যে তারিখে ব্যবহারকারী বুকিং করতে চাচ্ছে সেই তারিখটি প্রদান করতে হবে, ক্যালেন্ডার খুলে নির্দিষ্ট তারিখ নির্বাচন করুন অথবা ম্যানুয়ালি মাস/দিন/বছর লিখুন।
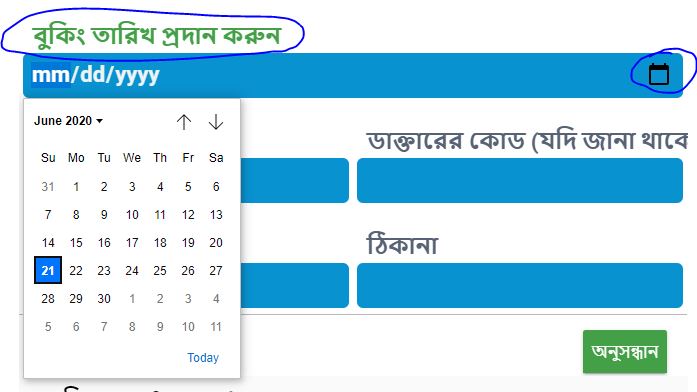
ডাক্তারের নাম এবং ডাক্তারের কোড (Doctors Name and Doctors Chamber code)ডাক্তারের নাম লিখুন এবং তার পাশের ঘরটিতে চেম্বার কোড লিখুন (যদি জানা থাকে)

ডিগ্রী এবং ঠিকানা (যদি জানা থাকে Degree and Address)এখানে ডাক্তারের ডিগ্রী এবং চেম্বারের ঠিকানা লেখা যাবে যদি জানা থাকে।

অনুসন্ধান (Search)নির্দিষ্ট তথ্য প্রদান করে অনুসন্ধান বাটনটিতে ক্লিক করুন। এবং এরপর আপনার কাংখিত ডাক্তারের এপয়েন্টমেন্ট নিন। মনে রাখতে এখানে বুকিং তারিখ প্রদান করাটা বাধ্যতামূলক, এছাড়া যেসকল তথ্য জানা আছে তার ভেতরে যেকোন একটি তথ্য দিয়ে আপনি ডাক্তারকে খুঁজে বের করতে পারবেন।
সময়ের স্লট নির্বাচন করুন (Select Time Slot)
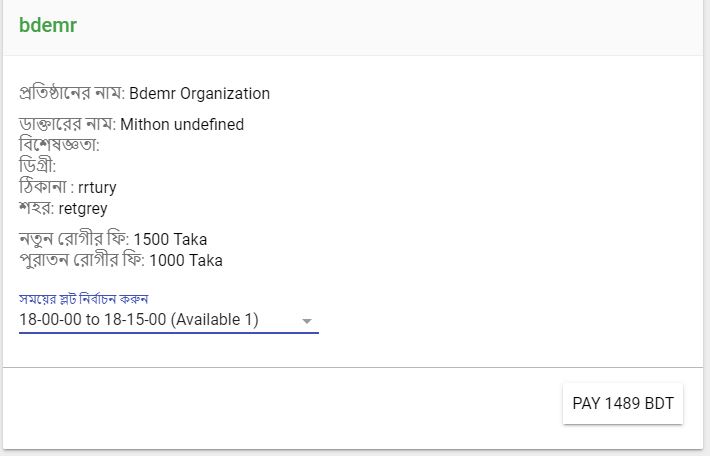
Pay or Book and pay from walletসময় নির্বাচনের পরে এই বাটনটিতে ক্লিক করলে আপনার এপয়েন্টমেন্ট নিশ্চিত হয়ে যাবে।
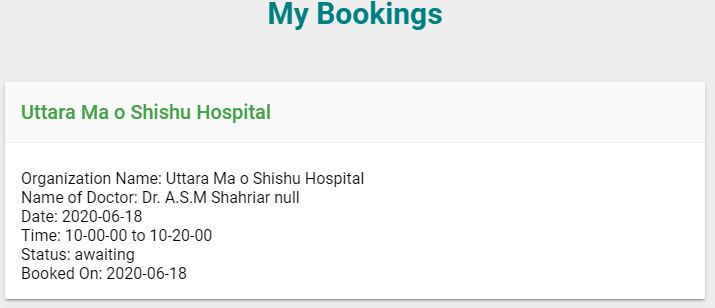
আমার বুকিং সমুহ (My Bookings)এখানে আপনি আপনার পূর্বের সকল বুকিং গুলো দেখতে পারবেন।
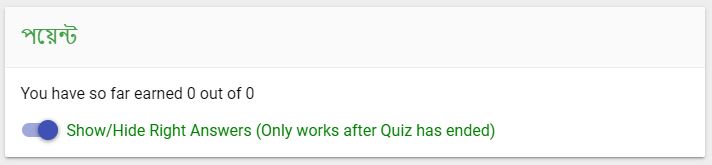
পয়েন্ট (Point)এখানে কুইজ খেলে ব্যবহারকারীর অর্জিত পয়েন্ট দেখা যাবে
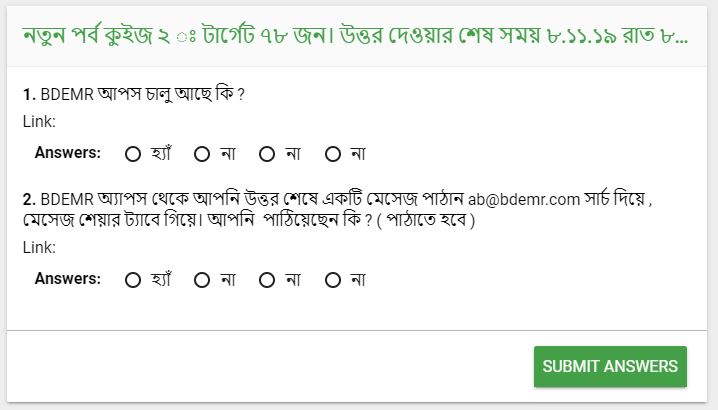
নতুন পর্ব কুইজ এবং submit answersএখানে বিডিএময়ার থেকে আয়োজিত কুইজের প্রশ্নের উত্তর দিতে হয় যেটি মাল্টিপল চয়েজ অপশন এবং প্রশ্নের উত্তর দেয়ার পরে submit answers এ ক্লিক করে আপনার উত্তরটি সাবমিট করুন।
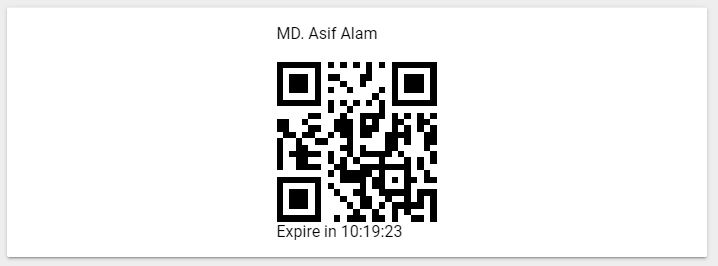
উপরিউক্ত ফীচারটিতে প্রবেশ করলে আপনার সকল তথ্য সহ একটি qr কোড দেখা যাবে।
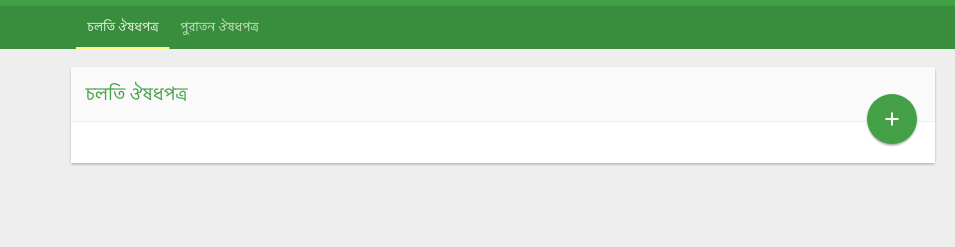
একদম উপরে লেখা চলতি ঔষধপত্রঃ (Current Medication) ও পুরাতন ঔষধপত্রঃ (Stopped Medication)
চলতি ঔষধপত্রঃ মানে যে সমস্ত ঔষধপত্র রোগী এখনো সেবন করছে।
পুরাতন ঔষধপত্রঃ মানে যে সমস্ত ঔষধপত্র ডাক্তার স্থগিত করেছেন /বন্ধ করেছেন/অথবা নির্দিষ্ট সময় পর্যন্ত নেওয়া হয়ে গিয়েছে শেষ হয়ে গিয়েছে। এই তালিকা দেখে চিকিৎসক বুঝতে পারবেন রোগী আগে কি কি ওষুধ খেয়েছেন।
চলতি ঔষধপত্রের পাশে সবুজের মধ্যে যোগ চিনহ (+): এটা ক্লিক করলে এখানে নতুন ওষুধ যোগ করতে পারবেন।
চলতি ঔষধপত্রের নীচে ক্রমিক সংখ্যা দিয়ে ওষুধের নাম দেখান আছে।
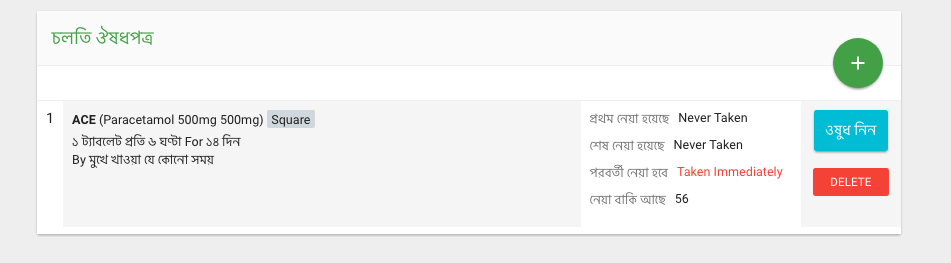
প্রথম কলামে ওষুধের নামের (কোম্পানির দেওয়া ব্রান্ড নাম) দেখা যাবে। তার একেবারে পাশে পাশে একই ওষুধের পুস্তকে লেখা পাওয়া নাম (pharmacological নাম), ওষুধের শক্তি বা মাত্রা , এবং ওষুধ প্রস্তুতকারী কোম্পানির নাম দেওয়া আছে। এর নীচে ওষুধের সংখ্যা খাওয়ার সময় ও নির্দেশনা দেখা যাবে।
একেবারে ডান পাশে যেখানে লেখা আছে "ওষুধ নিন" ( Take Medicine) সেখানে ক্লিক করলে "শেষ নেওয়া হয়েছে" (Last Dose) ঘরে বর্তমান সময় ও তারিখ দেখা যাবে। এখানে দেখেই একজন রোগী জানবেন যে তিনি আগর ওষুধ কখন খেয়েছেন। তার ডান দিকে
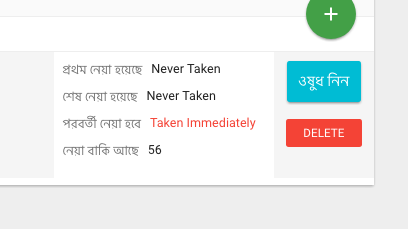
তার পাশে চিকিৎসক কর্তৃক দেওয়া মোট ওষুধের সংখ্যা দেখা যাবে। এটার নাম
"বাকি আছে " ( Doses left) । প্রত্যেক বার ওষুধ নিলে এখানে ১ টি করে সংখ্যা কমতে থাকবে। পুনরায় ওষুধ যোগ না করলে ওষুধ শেষ হয়ে গেলে আর ওষুধ নিতে হবে না।নতুন ঔষধ যোগ করব কিভাবে ?
চলতি ঔষধপত্রের পাশে সবুজের মধ্যে যোগ চিনহ (+): এটা ক্লিক করলে এখানে নতুন ওষুধ যোগ করতে পারবেন।
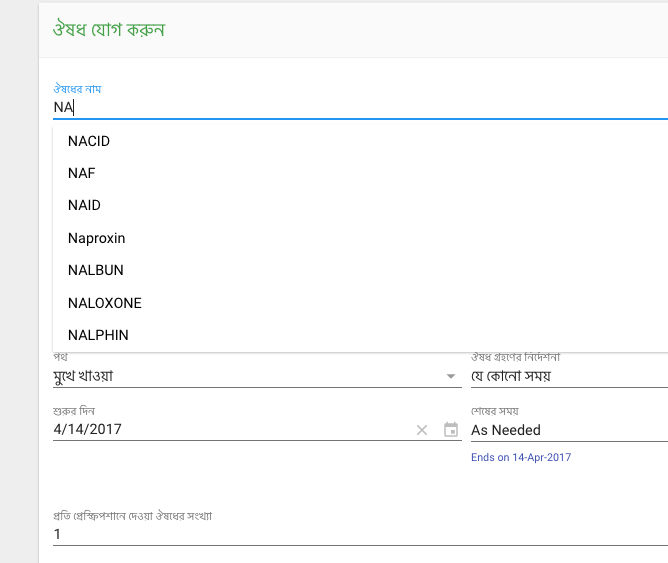
যেখানে "ঔষধের নাম" (Brand Name) লেখা আছে তার নীচে ইংরেজিতে আপনার ওষুধের প্রথম ২ টি অক্ষর লিখুন তাহলেই নীচে ওই নামের সাথে সম্পর্কিত সব ওষুধের তালিকা দেখতে পাওয়া যাবে ।
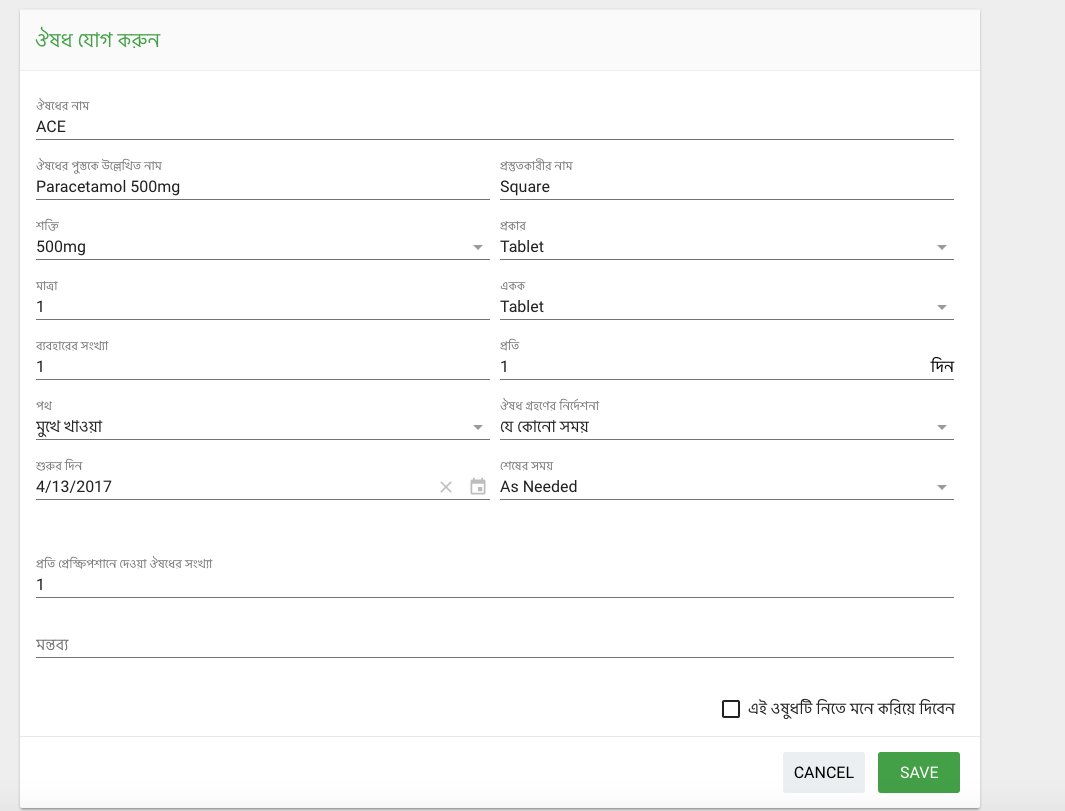
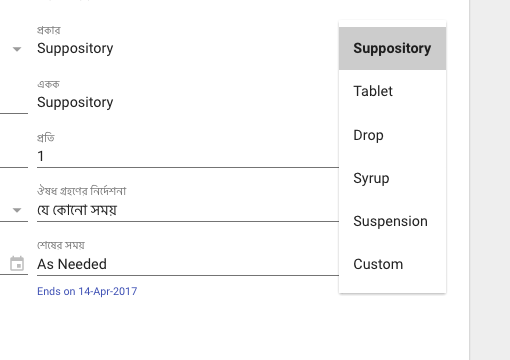
যদি প্রকার ১ এর বেশি থাকে ( যেমন একই ওষুধের সিরাপ/ ট্যাবলেট/ ক্যাপস্যুল ) এবং আপনি যে প্রকার ওষুধ খান তা না থাকে তাহলে প্রকার এর ঘরে ক্লিক করুন। এখানে আপনি অন্যান্য প্রকার দেখতে পাবেন। প্রয়োজনীয় প্রকার ক্লিক করুন।
আপনি মাত্রার ঘরে ১ বা ২ বা চিকিৎসকের দেওয়া সংখ্যা পূরণ করুন। একক অর্থ ১ টি ট্যাবলেট/ ১ টি বা ২ টি ক্যাপস্যুল/ অথবা ১ চামচ/ ২ চামচ / বা ১ ফোঁটা বা ২ ফোঁটা / ইনজেকশনের ক্ষেত্রে ১ এম্পুল বা ২ এম্পুল ইত্যাদি।

ব্যবহারের সংখ্যা (Times per) নির্দেশ করে দিনে কতবার নিতে হবে যেমন দিনে ৩ বার/ ২ বার/ ৪ বার ইত্যাদি।

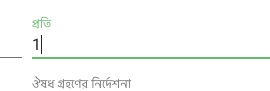
প্রতি (Every)ঃ এখানে প্রতি ১ দিন নির্দিষ্ট আছে । ডান পাশের উপর/ নীচ তীর চিনহ দিয়ে এই সংখ্যা বাড়ানো ও কমানো যাবে।
পথ(Route) ঃ এটি নির্দেশ করে কোন পথে ওষুধ সেবন করতে হবে। যেমন মুখে খাওয়া, বা শিরায় ইঞ্জেকশান দেওয়া, বা চামড়ার নীচে ইঞ্জেকশান দেওয়া, বা জিহ্বার নীচে দেওয়া ইত্যাদি।

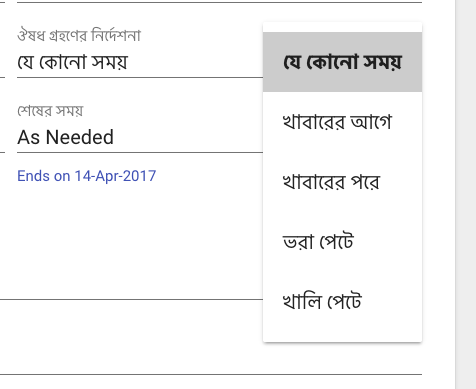
ঔষধ গ্রহণের নির্দেশনাঃ(Direction)ওষুধ টি কিভাবে খেতে হবে তার নির্দেশনা থাকে এখানে যেমন, খালি পেটে বা ভরা পেটে, অথবা যে কোন সময় ইত্যাদি।
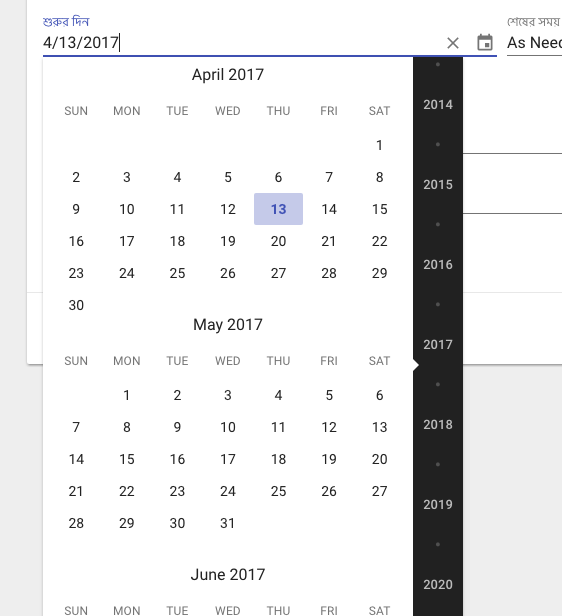
শুরুর দিনঃ (Start Date)যে দিন এই ওষুধ যোগ করা হবে সেটা শুরুর দিন হিসেবে গণ্য হবে। এখানে ডান পাশে একটি ক্যালেন্ডার আছে , তার মাধ্যমে অতীতের বা ভবিষ্যতের শুরুর দিন যোগ করা যাবে।

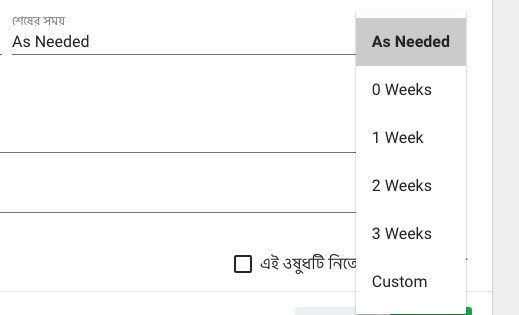
শেষের সময় ঃ(Ends onশেষের সময় ঃ(Ends on) এখানে লেখা যাবে যে এই ওষুধ কয়দিন চলবে। পাশের নীচের তীর চিনহ তে ক্লিক করুন। এখানে ১/২/৩ সপ্তাহ দেওয়া আছে। এর যে কোন টি ক্লিক করলে পাশে আবার দিন দেওয়ার ব্যবস্থা আছে।
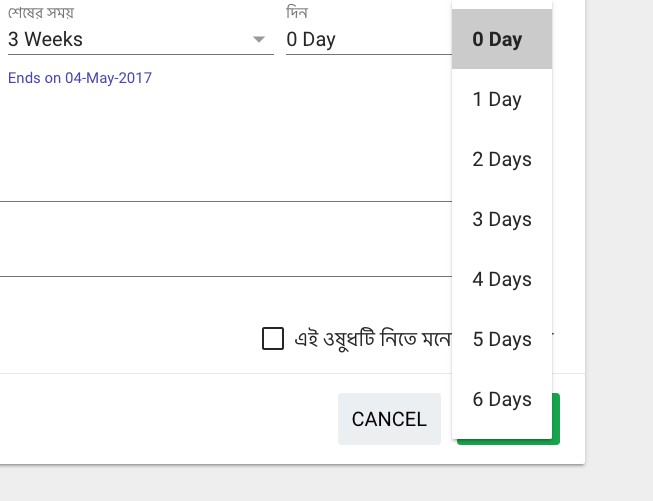
কেউ যদি আরও অনেক বেশি দিনের জন্য দিতে চান তবে এখানে"কাস্টম"(Custom)ক্লিক করলে ডান পাশে আরেকটা ক্যালেন্ডার দেখা যাবে । সেখান থেকে দিন ঠিক করা যাবে। ভবিষ্যতের যে কোন দিন দেওয়া যাবে।

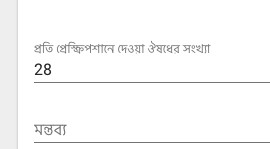
প্রতি প্রেস্ক্রিপশানে দেওয়া ওষুধের সংখ্যাঃ এটি স্বয়ংক্রিয়ভাবে মোট ওষুধের পরিমাণ নির্দিষ্ট করে। যেমন কোন ওষুধ দিনে ২ বার করে ৭ দিন দেওয়া থাকলে মোট ১৪ টি ওষুধ প্রয়োজন। রোগী জানবেন তাকে মোট কয়টি ওষুধ কিনতে হবে।
পরবর্তীতে ক্রয়যোগ্য বা Refilঃ একবার নির্দেশনা দেওয়ার পরে যদি রোগীর আবার ওই ওষুধ খাওয়ার প্রয়োজন পরে তবে চিকিৎসক এটি যোগ করতে পারেন।
মন্তব্যঃ (Coments) এই ওষুধ সম্পর্কে চিকিৎসক যদি অতিরিক্ত কোন মন্তব্য লিখতে চান এখানে লিখতে পারেন।
যে কোন সময়ে যদি এই ওষুধের ক্ষেত্রে কিছু ভুল হয়ে যায় তবে রিফ্রেশ ট্যাবে ক্লিক করুন। পাতা টি পুনরায় ব্যবহারের উপযোগী হবে নতুন ওষুধ অন্তর্ভুক্তির জন্য।
কোন সময়ে যদি ওষুধ যোগ করতে অথবা অন্য কোন তথ্য যোগ অসুবিধা হয় তাহলে এপ্লিকেশন টি বন্ধ করে আবার খুলুন।
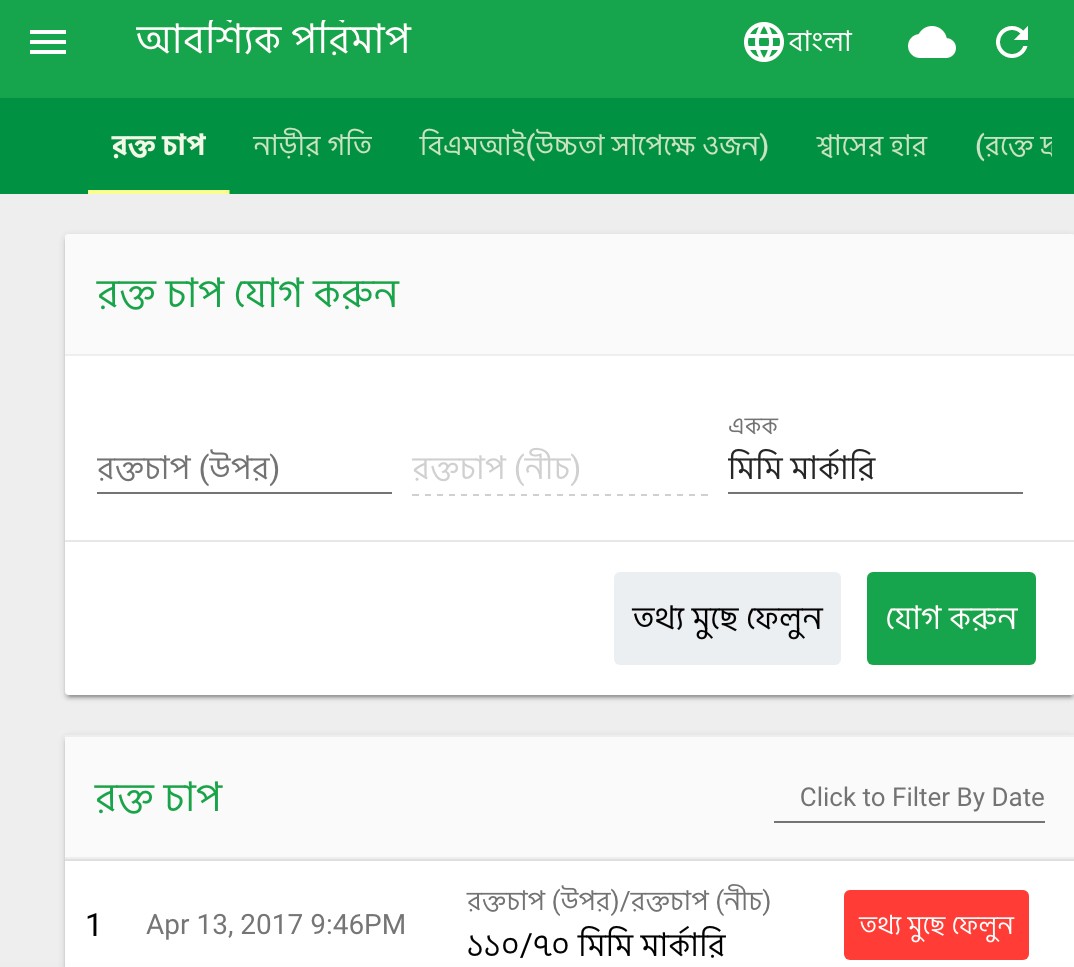
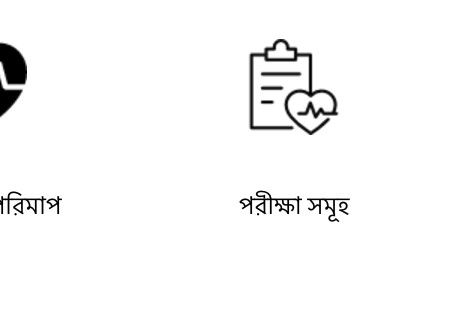
আবশ্যিক পরিমাপ (My Vitals)ঃ এখানে রক্তচাপ, তাপমাত্রা, শ্বাস ও নাড়ীর গতি, ওজন ও উচ্চতা ইত্যাদি লেখা যাবে।
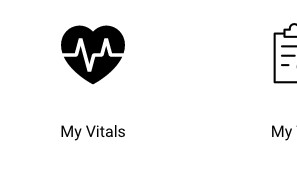


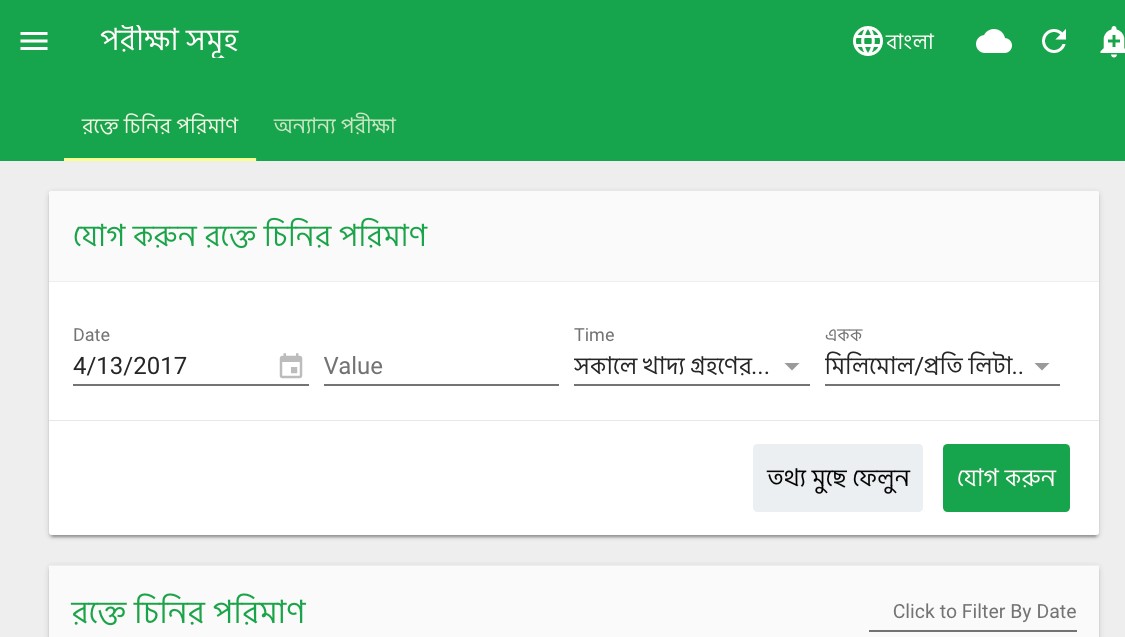
পরীক্ষা সমূহ (My Test)ঃ
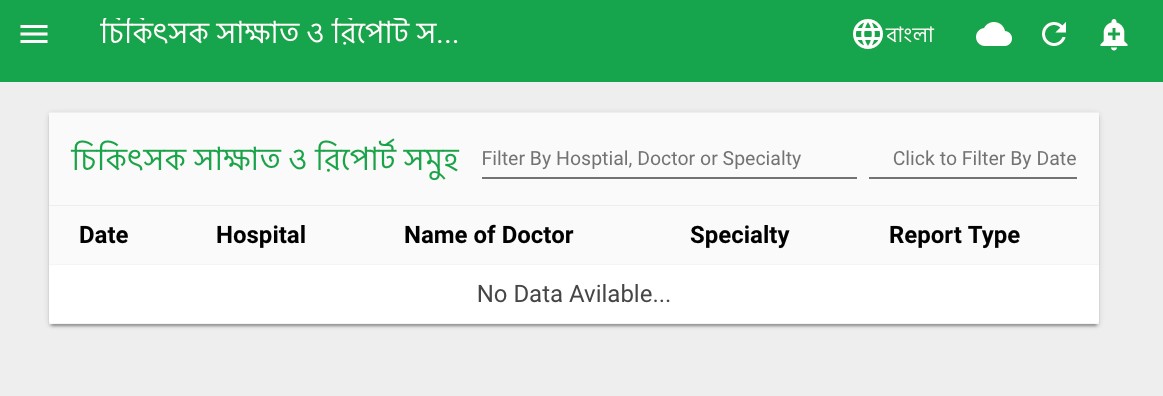
চিকিৎসকের সাক্ষাত ও রিপোর্ট সমূহ (My Visits এন্ড Reports)ঃ এখানে সাক্ষাত করা সকল চিকিৎসকের নামের তালিকা পাওয়া যাবে।
My diagnosis বা ডায়াগনোসিস সমূহ
চিকিৎসকের সঙ্গে সাক্ষাতের সময় আপনার রোগের বর্ণনা, পরীক্ষা শেষে চিকিৎসক একটি ডায়াগনোসিস লেখেন। এখানে সেটি পাওয়া যাবে। এর ফলে আপনার জীবনের সব রোগের সংক্ষিপ্ত বর্ণনা তারিখ অনুযায়ী দেখা যাবে। চিকিৎসক এখান থেকে প্রয়োজনীয় তথ্য পাবেন। পাবেন,

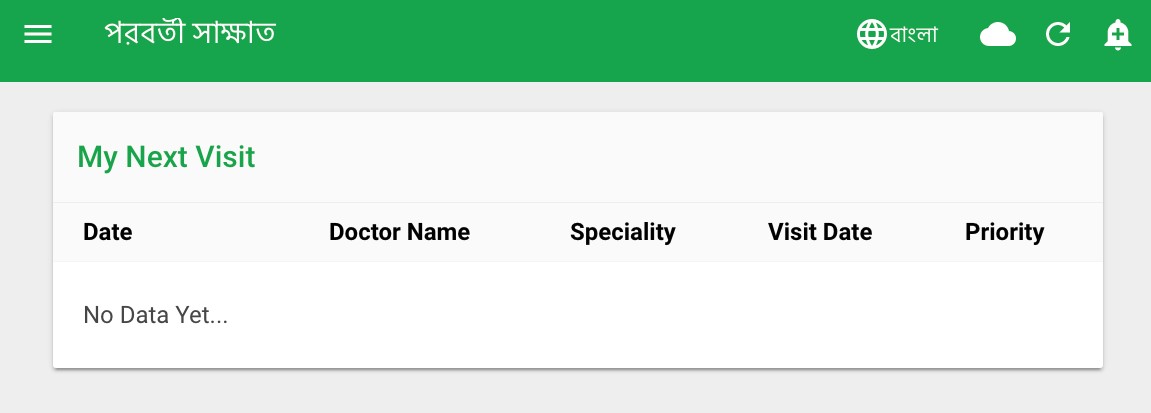
পরবর্তী সাক্ষাত ঃ (My next Visit) এখানে পরবর্তী সাক্ষাতের তারিখ ও চিকিৎসকের নাম দেখা যাবে
পরিচিতি ও অবস্থান ঃ (Demography) এখানে রোগীর নাম ঠিকানা, রক্তের গ্রুপ, এলার্জি , নিকটাত্মীয় এর যোগাযোগের ঠিকানা ইত্যাদি লেখা যাবে।
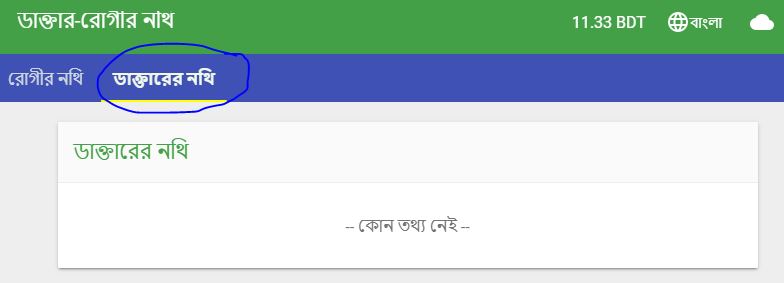
ডাক্তার ও রোগীর নথি (Doctor and Patient's note)ঃ এখানে রোগী তাঁর রোগের বর্ণনা লিখতে পারবেন। যা সরাসরি পৌঁছে যাবে চিকিৎসকের কাছে। চিকিৎসক এই বর্ণনা দেখে চিকিৎসা দিতে পারেন, অথবা অভিমত দিতে পারেন । সেটা আবার রোগীর কাছে পৌঁছে যাবে এই এপে।
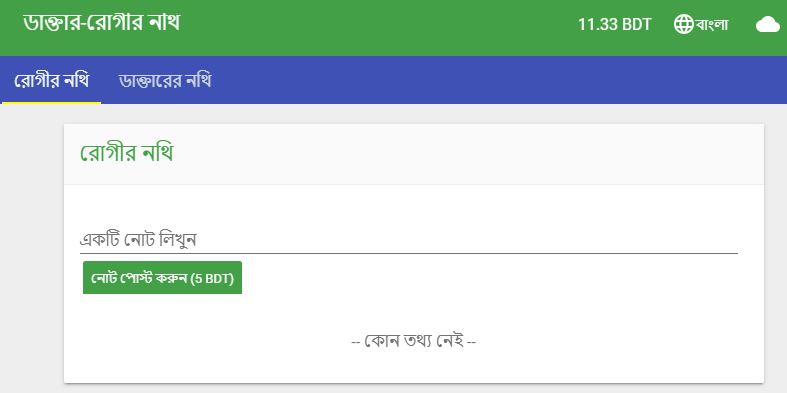
এখানে আপনার রোগের বর্ণনা অথবা সমস্যার প্রতিউত্তর হিসেবে ডাক্তার হতে পাওয়া নথি দেখতে পাওয়া যাবে।
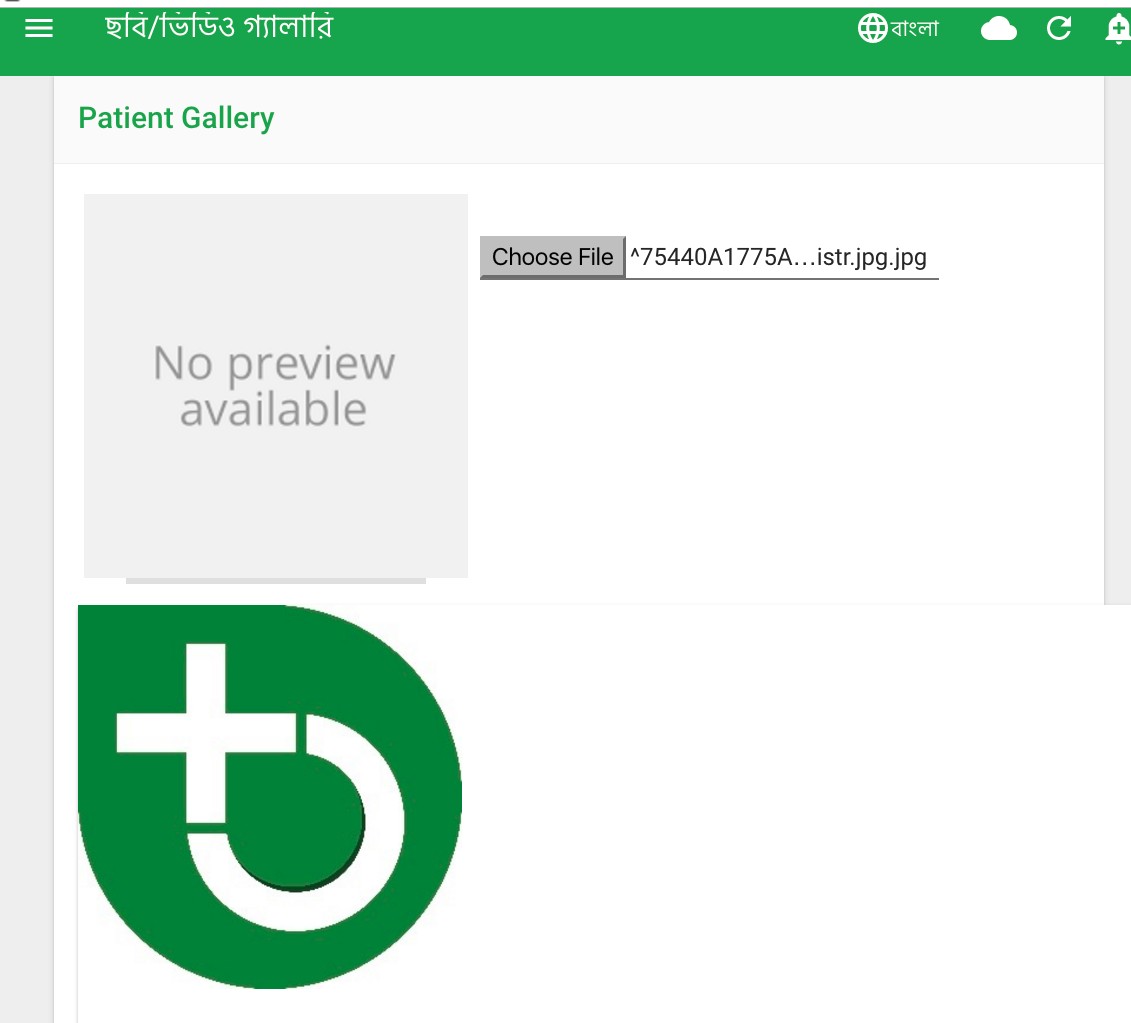
ছবি/ভিডিও গ্যালারি (Patient Gallery)ঃ এখানে রোগী বা চিকিৎসকের আপলোড করা ছবি/ভিডিও ও নথি রাখা যাবে।
আপনার আপলোড করা ছবি দেখুন এখানে
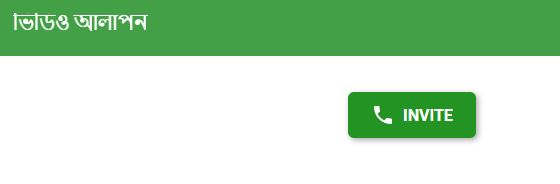
ভিডিও আলাপন (Video Chat)এখানে আপনি অন্য রোগী অথবা চিকিৎসকের সাথে সরাসরি ভিডিওতে কথা বলতে পারবেন এবং ডাক্তারের সেবা নিতে পারবেন।
Invite বাটনটিতে ক্লিক করুন
যার সাথে কথা বলতে চাচ্ছেন তার নাম্বারটি প্রবেশ করুন নির্দিষ্ট স্থানে (নীচের ছবির মতন)
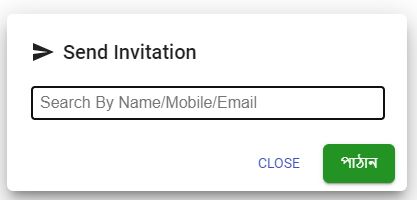
পাঠান বাটনটিতে ক্লিক করুন, অপরপ্রান্তে এ্যাপ ব্যবহারকারীড় কাছে ভিডিও চ্যাট রিকোয়েস্ট চলে যাবে। এবং এভাবে একে অপরের সাথে কথা বলা যায়।
ডাক্তার আপনাকে ভিডিও চ্যাটে ইনভাইট করলে আপনাকে এক্সেপ্ট বাটনটিতে ক্লিক করতে হবে।

Send Notification বাম দিকের প্যানেলে এভাবে দেখুন
ড্যাশ বোর্ডে দেখুন এখানে

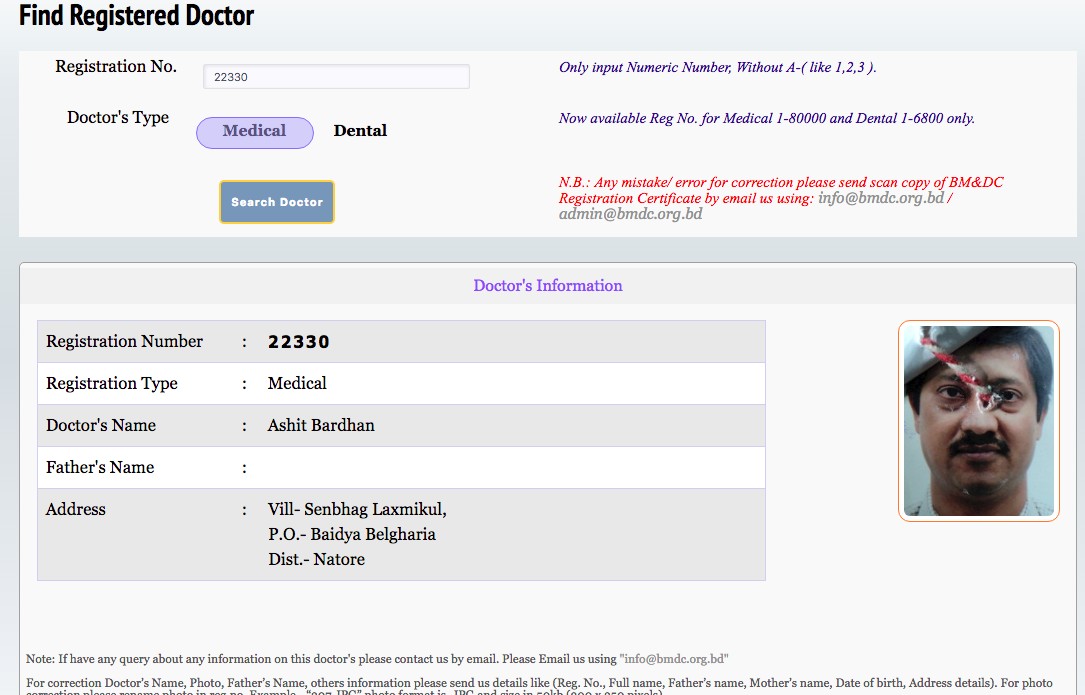
চিকিৎসকের বৈধতা পরীক্ষা করুন
লগ আউট ঃ (Log Out) এপ টি বন্ধ করতে লগ আউট করুন।
This is a basic tutorial for using doctor app, more updates will be added soon
Log in
After log in you will see this page. If you are signing in for the first time , please send email requesting activation code to the email mentioned. If you are singing in and belong to an institution, the hospital admin will/may have the activation code.
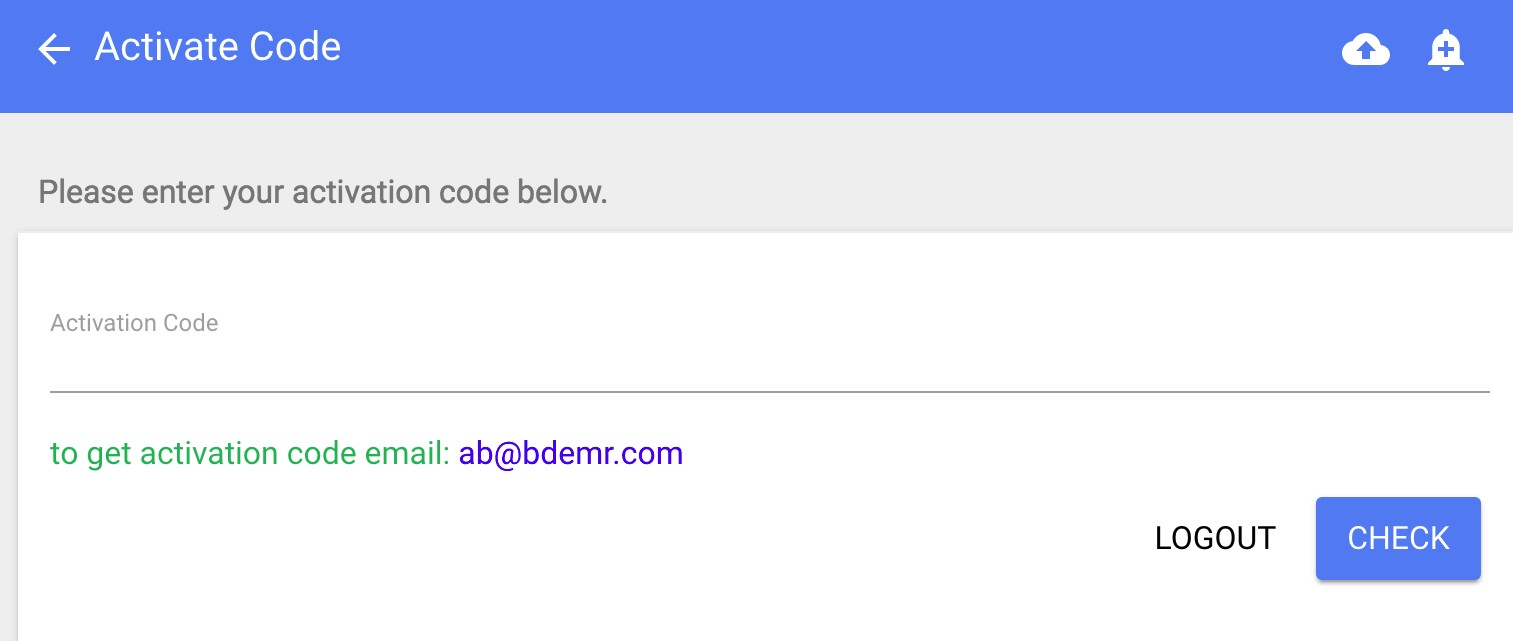
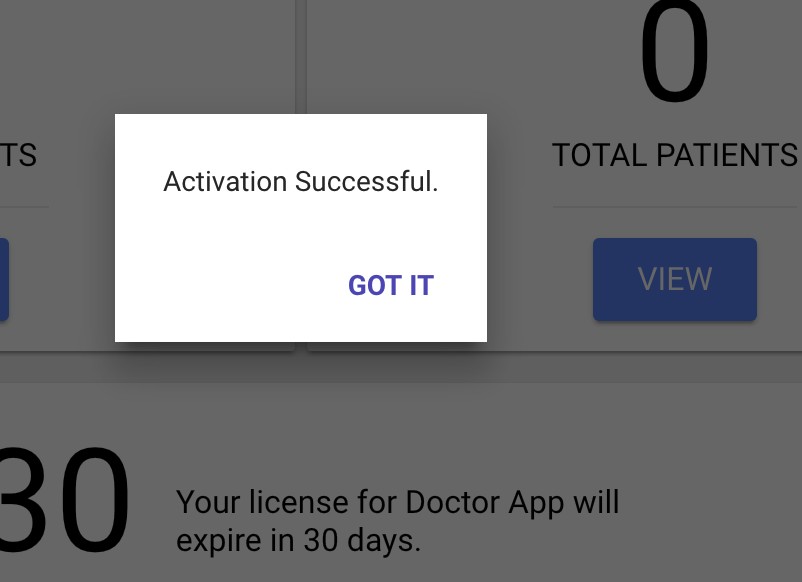
Insert the activation code. Please make sure that there is no space after that. Click check and then Activate. Click on activate and will get this message on the screen.

The Hamburger Sign (Row of 3 lines) on the left shows the left panel from which you can enter into different part of EMR


Patient Manager( on the left pane) takes you to patient finder


 Click on the “GOT IT” to move back
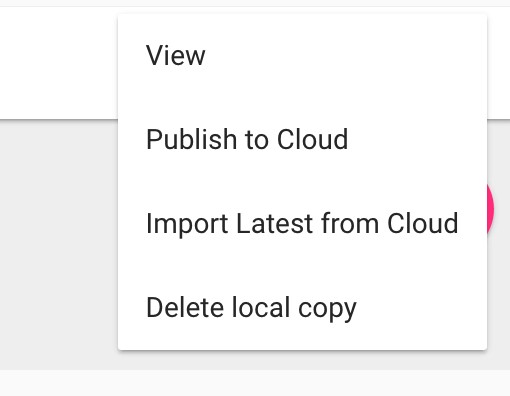
Click on the three dots and following option will be seen
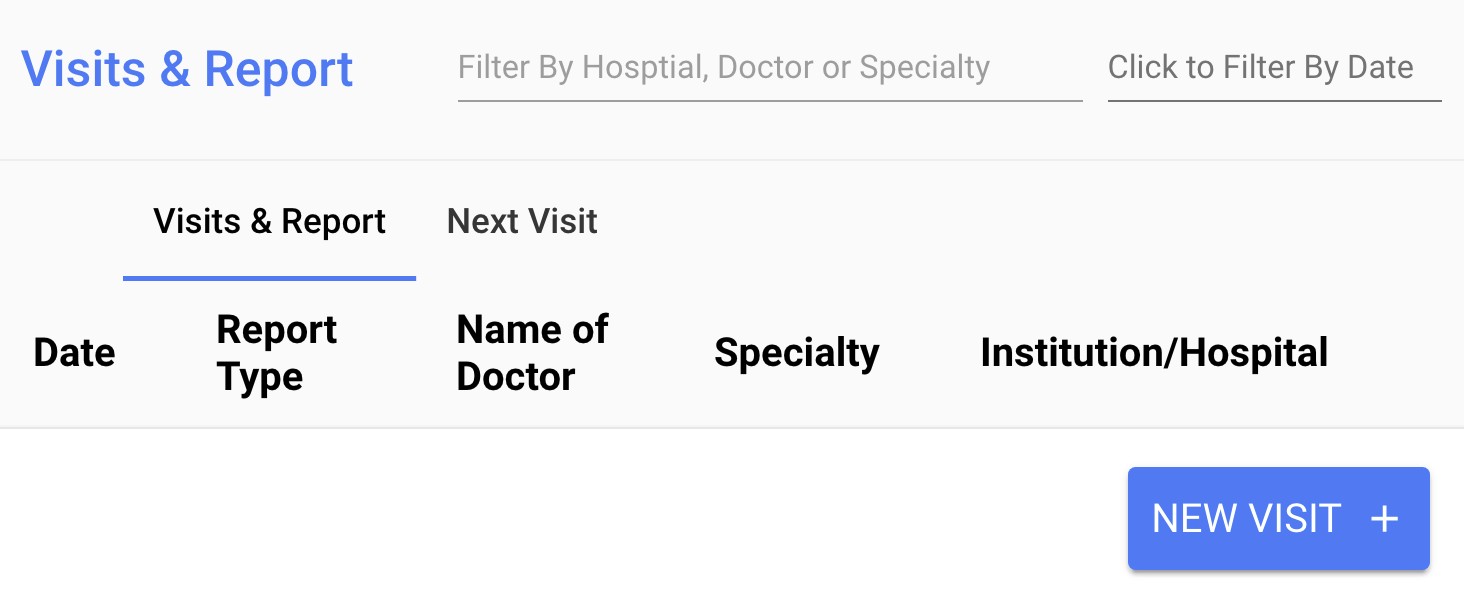
Visits & Reports
Test results:will show patient’s all previous tests. Considering prevalence of diabetes blood test is separated from other test.
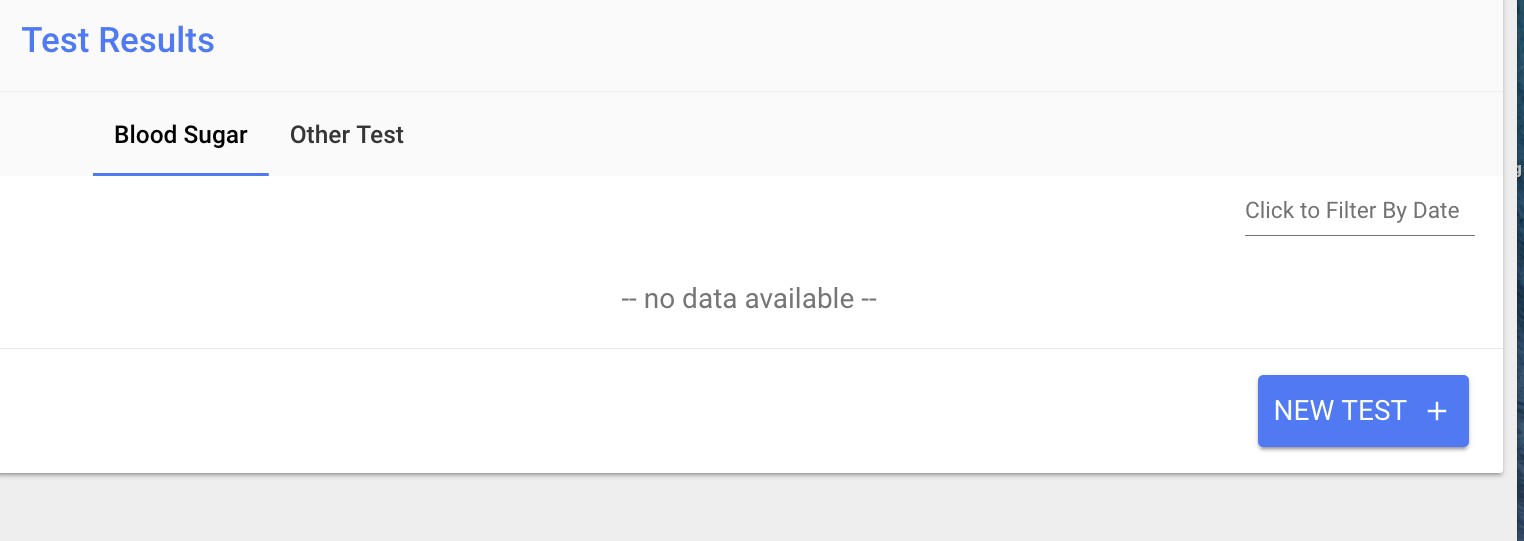
If a doctor wants to enter
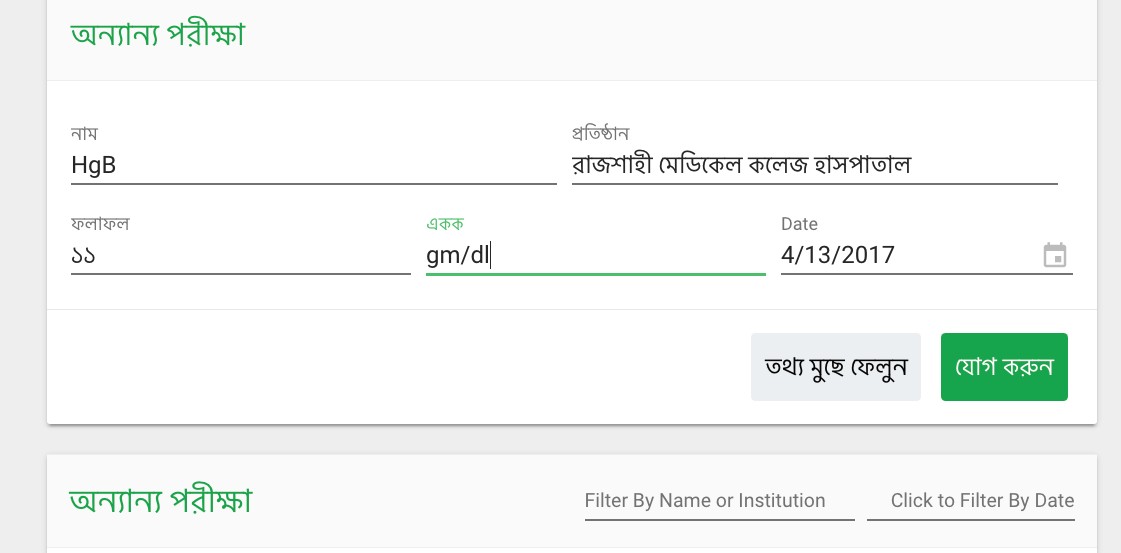
new test results, please click on “NEW TEST”Similar to test results it has “blood sugar” and “other tests”. For other test, name of the test, institution, result, unit needs to be entered. All the test results can be filtered by name and also by latest results can be filtered by name and also by date. Like the image below is filtered for july 1 2017 to july 2 2017.

Doctor Patient Note This is to exchange message between doctor and patient (only delivered to the account holder). Any relevant message can be sent. This message does not cost doctor any money but patient may/have to pay. All the messages sent by the doctor or doctors are seen under the Doctors Note, and all message sent by the patient are seen under patients note.
Patient Gallery Patient or doctor can upload any photo or video to this patient’s account. The upload is saved under patient and may attract a payment.
Activity Log All the activity of the doctor is logged here. This part is not seen by patient generally but kept saved in server. This part is important in area where patient complains that the patient was not attended for a long time. Any entry has a log and will help doctor or health personnel to prove that they have attended the patient.
New Visit To create a new visit please click on
History and Physical: this part is for detailed history including past complaints. This history taking can be done by a doctor who is a specialist doctor’s assistant or another doctor who has taken detailed history and recorded it. This part can be copied from previous history and physical and save time for the busy practitioner.
Click on “create” to take a detailed histroy. The format is predefined system and required to click on the required field.
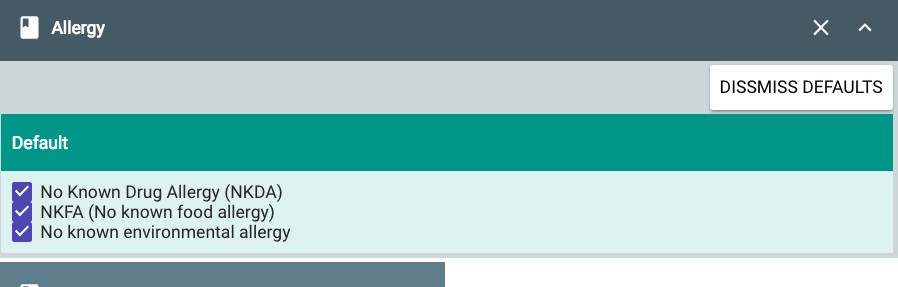
Some special rules apply here . One of them is called default. It means if it is not dismissed, a prewritten segment will be printed. If the “default “ is dismissed than the system is opened and new entry is possible. Few screenshot to elaborate.


If we click on the
“DISMISS DEFAULT” the following section opens up. Select the necessary box or write a new at the bottom “ enter custom text area” and press ‘enter’
This icon will expand. This rule applies to all section


History of Current Medical Problem / Diagnosis


Family History

Previous Anesthetic / Surgical History

Previous Anesthetic / Surgical Complications

Chronic Pain

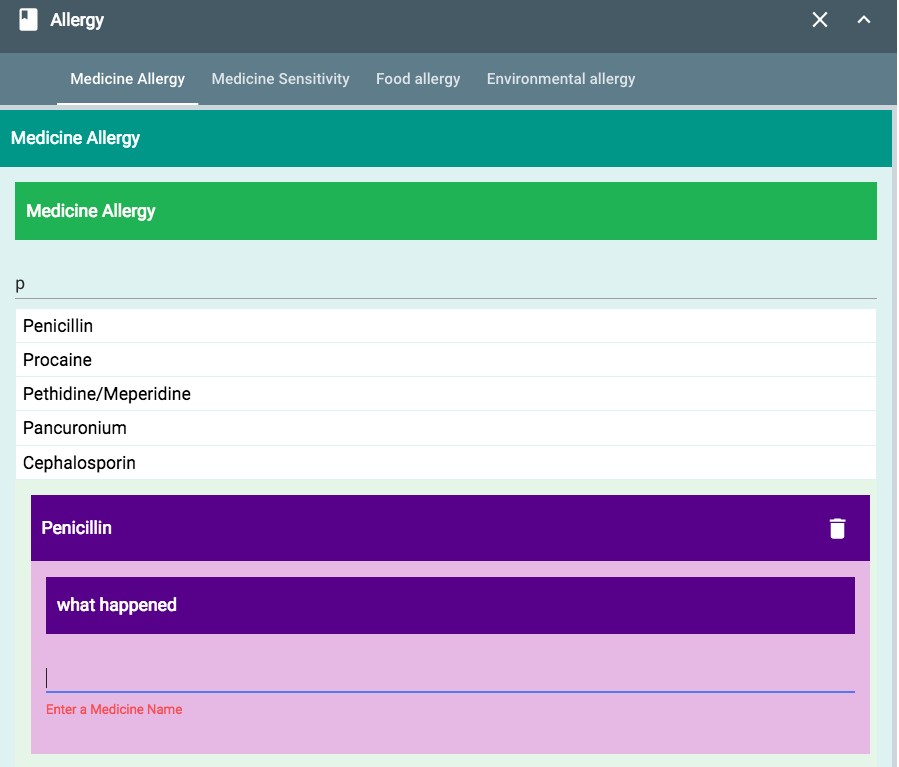
Allergy
After clicking on dismiss default and typing P
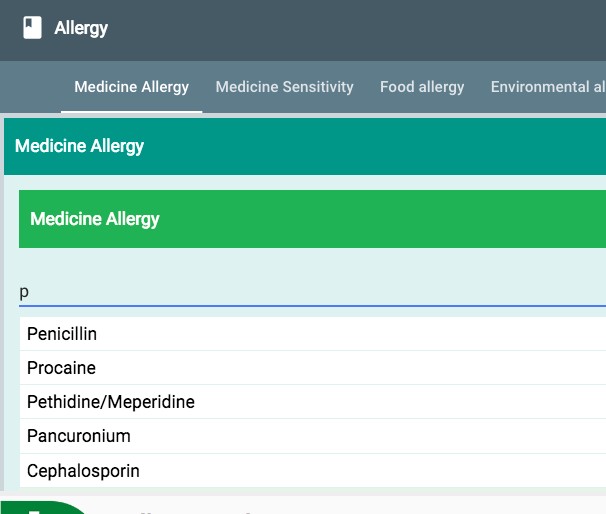
After selecting penicillin it appear below
Writing “r” below “what happened” will show the available option.
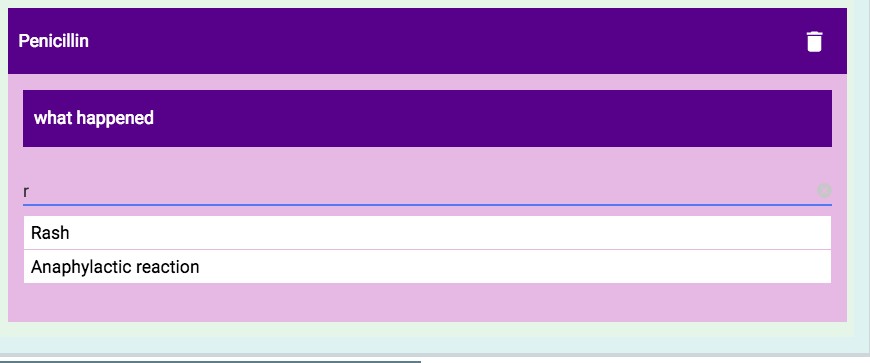
Select accordingly or write your own. To delete please click on the delete icon.
Social History


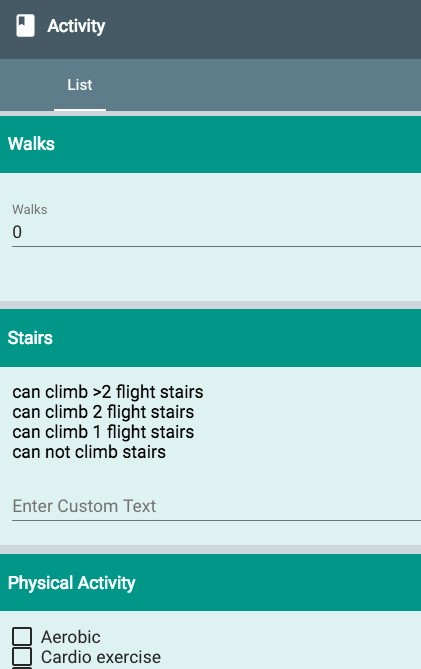
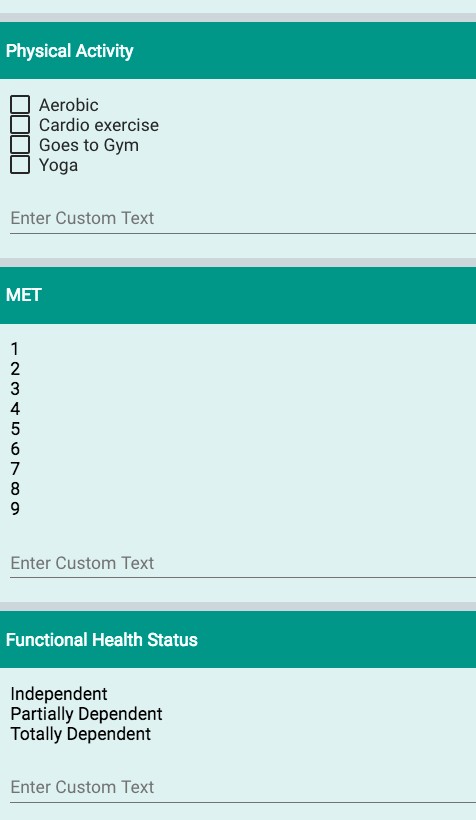
Activity
Physical Parameter See the following picture. Units can be converted
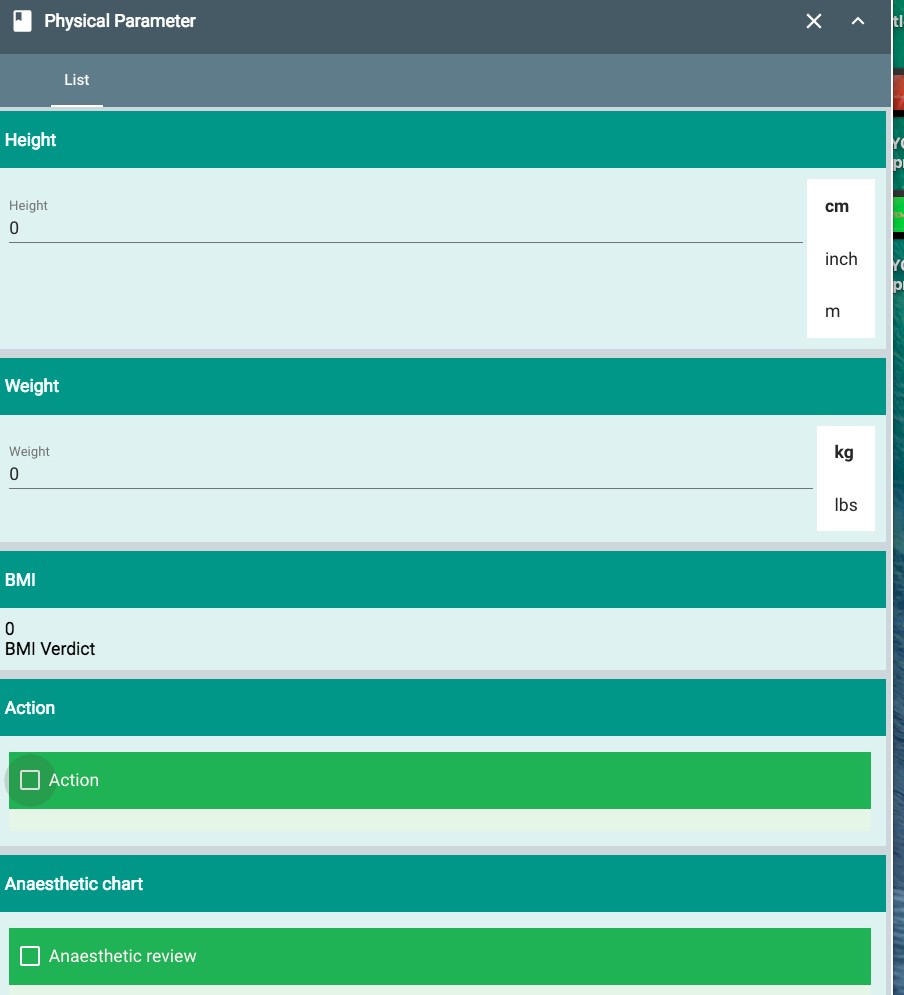
Action is for nursing or other health professional assesment to order investiagtionis the patient is found to be obese
Comments

Right beside the History tab there is another tab called
“Examination”selecting this tab will show a list of examining options as shown in the image below.

Airway


Respiratory Examination

Chronic pain/Neurological examination

Surgical examination


Name of the test performed

Beside the Examination tab there is another tab named
“Investigations”, by selecting this tab doctors will see a series of options related to investigations itself.

Renal

Glucose

Coag

ECG


CT

MRI

ABG(Arterial Blood Gas)

VBG(Venous Blood Gas)


Lung function test/Spirometry

Other Investigation

“Diagnosis” at the top bar. Exploring that tab, they will see multiple options regarding diagnosis. They can add different diagnosis details by selecting the respective option from the Diagnosis bar. Diagnosis only contains one section and that is Diagnosis itself.

Selecting
“Discussion” will show tabs like patients refusal, general discussion etc.These tabs are discussed below.
Chronic Pain

Patient Refusal

General Discussion

Resuscitation

Surgical Procedure & Complication

Proceeding to the right we see another tab named “Optimization”

Request Consult


Discontinue Medicine

Going further right to the last tab is “Plan”

Plan after consult

This concludes all the feature in History & Physical, now pressing the back arrow we come back to new visit page again and thus move on exploring other tabs.
Diagnosis:

Test Advised:


Prescription:


Notes:


Patient Stay:


Next Visit:


The circular pink Plus(+) button


আপনি যদি ওয়েবসাইট ব্যবহার করতে চান তাহলে clinic.bdemr.com ভিজিট করুন।
Log in করুন


Creating or Selecting Organization
After logging in you will see a page that looks like this, press the button “create/join organization” button.


Hamburger sign and the Dashboard
The Hamburger Sign (Row of 3 lines) on the left shows the left panel from which you can enter into different part of EMR


Cloud sign and Notification bell
Cloud sign:


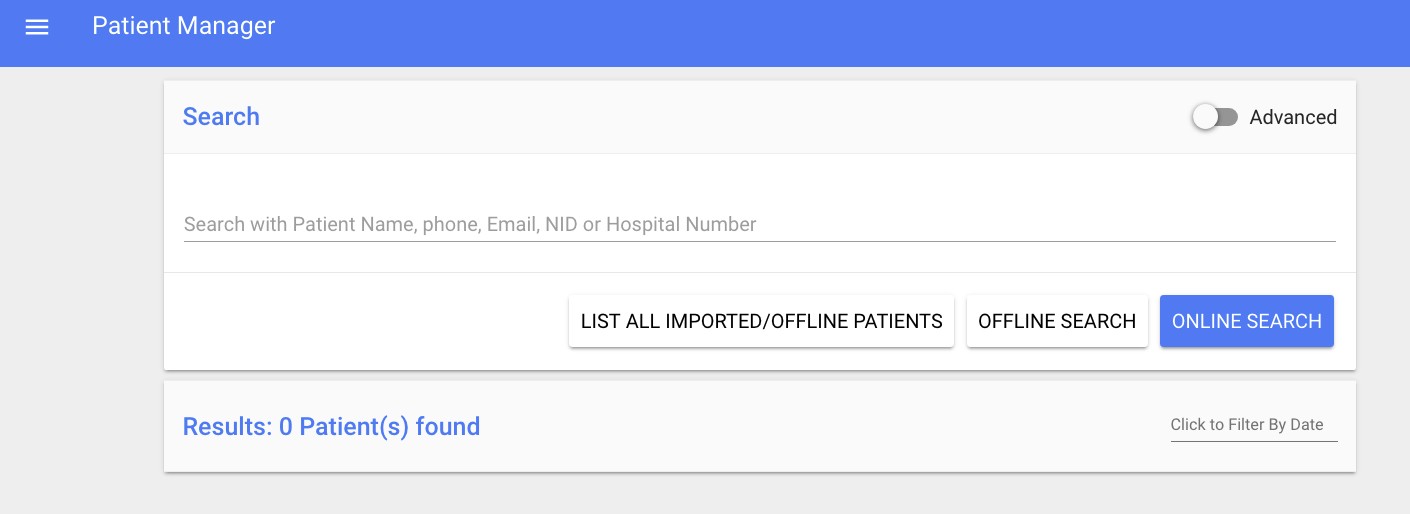
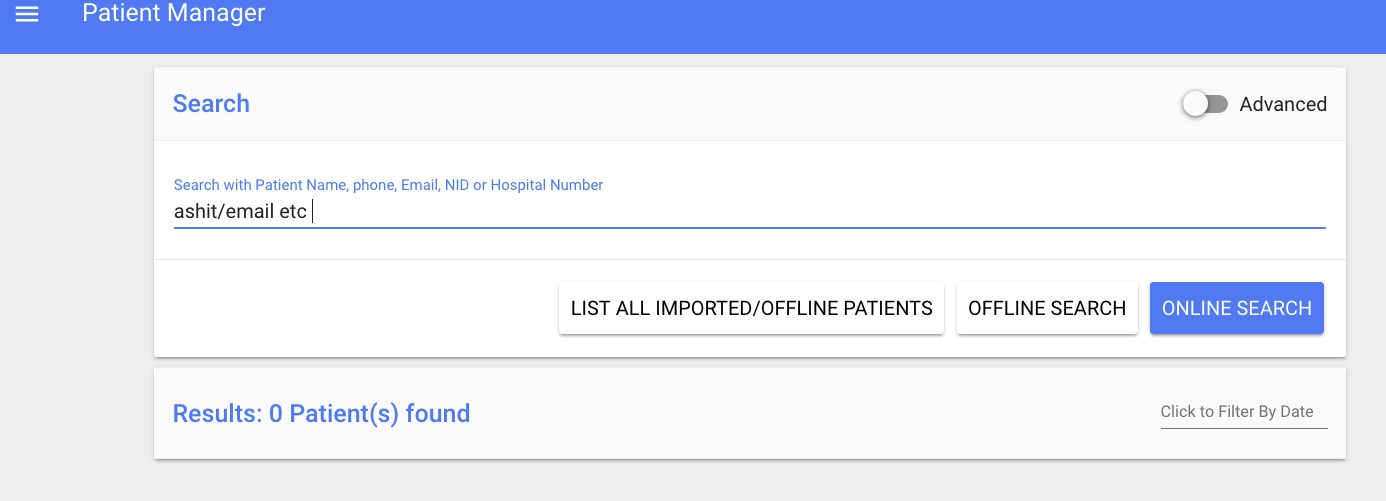
Patient Manager
Patient Manager (on the left panel) takes you to patient finder


Clicking on View
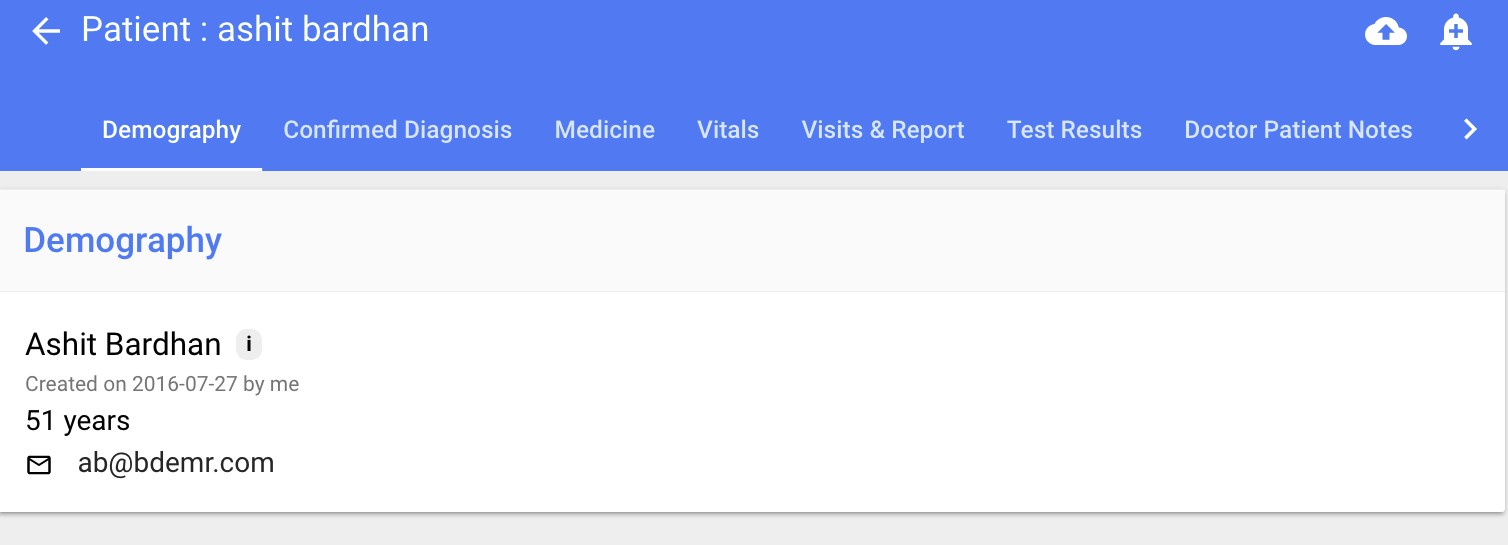
Now clicking on view will show a page where you will find
Demography:
This is just an example.


Organization Manager
Here user can see which organization they belong to and what is their role in that organization.
They can also search and create new organization from here.


Pending Reports
Accounts Manager
Clinic owners can add incomes,expenses and see their net profits from this section of the clinic app.


Pharmacy Manager
This section of the app helps to keep record of all the pharmaceutical items sales. Buying price and selling price of the items with quantity and expiry date, makes the process of keeping records easier.

Invoice Manager
A simple section for managing all the invoices and printing them.

Commission Manager
Clinic/Hospital can check their third party commission from here. They can search the person by name or by their mobile number. They can also filter date range for specific timelines.

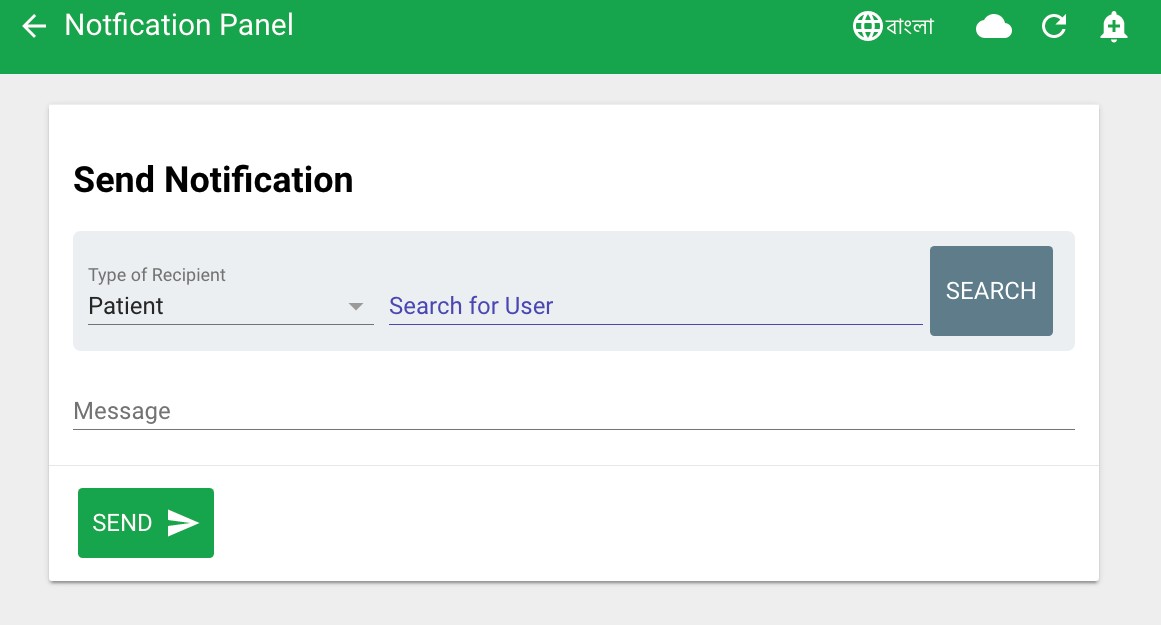
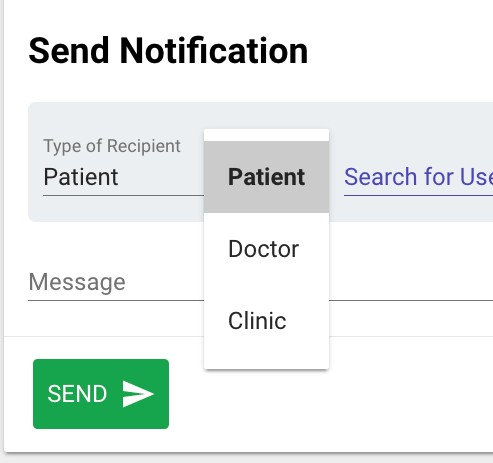
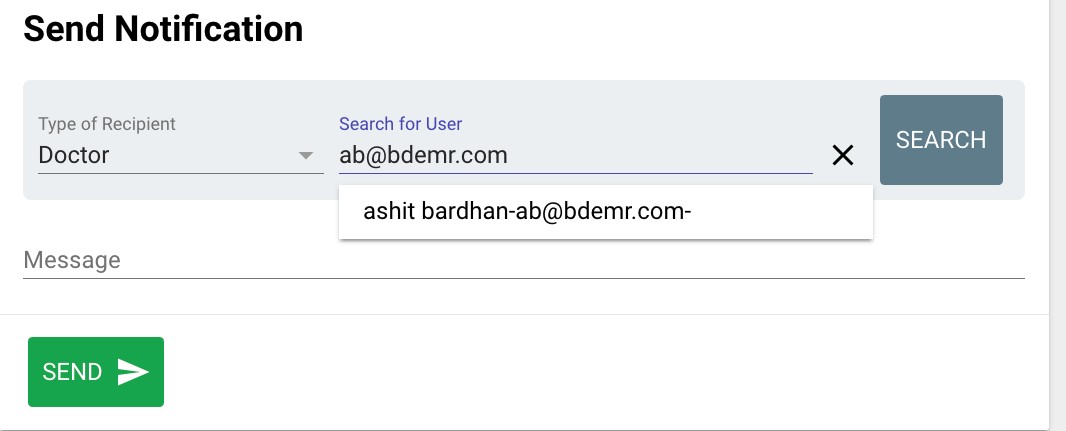
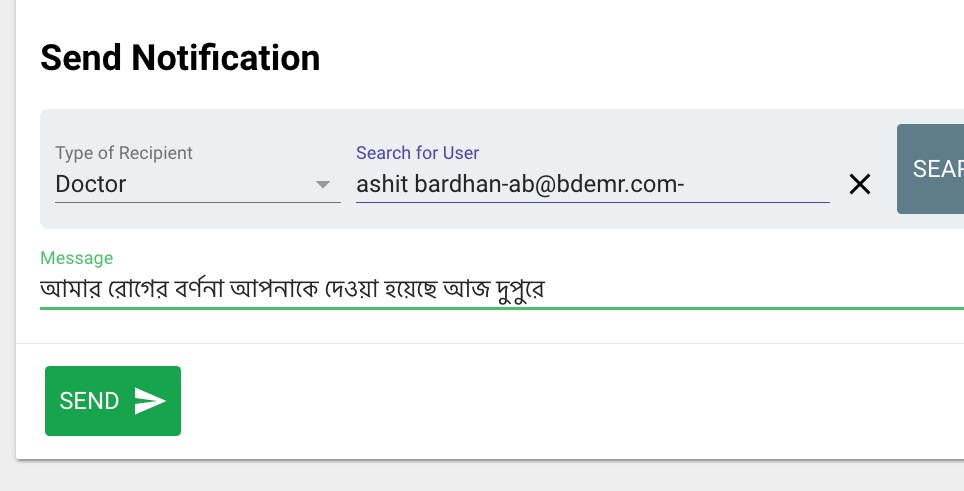
Send Notification
From here user can send notification to Doctor, Patient and Clinic.Simple messages can be sent from here. You may remember the notification bell from the earlier part of the document, notification sent by anyone is instantly shown by the notification bell. A search option available for convenience

THIS CONCLUDES A BASIC TUTORIAL OF THE CLINIC APP.
FOR FURTHER INSTRUCTIONS OR INQUIRY PLEASE CONTACT US AT contact@bdemr.com